To automate blog posts with AI in WordPress, you build a workflow that generates, formats, and publishes drafts on a trigger such as a schedule, an RSS item, or a spreadsheet row. AI Workflow Automation, a free WordPress plugin, does this end to end inside your dashboard: no Zapier, no external subscription, and you keep every draft in review before it goes live.
I develop AI Workflow Automation, so the steps below use the real node names and field labels from the builder. AI Workflow Automation is a free WordPress plugin with a visual drag-and-drop builder that runs AI workflows, agents, and chatbots inside your own site, using your own API keys, with no external subscription required.
What does automating blog posts with AI in WordPress actually involve?
Automating blog posts means turning a repeatable content job into a workflow: something starts it, an AI model writes the body, other nodes handle the title, images, and SEO, and a final node creates the WordPress post. The automation is the plumbing between those steps, not the writing itself.
The distinction matters because the writing is the part most people already have an opinion about. What they do not have is a reliable way to get a finished draft into the right post type, with the right category, at the right time, without copying and pasting from a chat window twice a week.
Three jobs cover most of what people actually automate:
- Recurring topical drafts. A fixed brief runs on a schedule and files a draft for an editor.
- Source-driven posts. An RSS item, a form submission, or a webhook payload supplies the raw material.
- Bulk backlog clearing. A list of titles or keywords is processed one item at a time by a Loop node.
What are the building blocks of an AI blog post workflow?
Every AI content workflow in AI Workflow Automation is assembled from four kinds of node. Knowing which one owns which job saves you from the most common wiring mistake.
| Job | Node | Key fields |
|---|---|---|
| Start the workflow | Trigger node | Manual, WordPress Core, Webhook, RSS, form submission, or Workflow |
| Write the body | Write Article node | Content, Word count, Writing style |
| Produce a title and metadata | AI Prompt node | Structured output toggle, schema fields |
| Tune for keywords | Optimize SEO node | Text input plus target keywords |
| Create the post | Create Post/Product node | Post type, Post status, Field mappings, Scheduled date |
| Hold for review | Human Input node | Approval Required or Modification Required, Assign to User or Role |
The Write Article node is the workhorse. It takes a topic and instructions in the Content field, a Word count between 100 and 10,000 (the default is 1,000), and an optional Writing style. It returns one long article, referenced downstream as [Input from writeArticle-1].
The wiring mistake to avoid: post_title and post_content are separate required inputs on the Create Post/Product node, and they must come from separate upstream fields. Do not wire one plain AI text block into several fields and invent field tags it does not produce. Use one AI Prompt node with Structured output turned on and a schema field per target instead.
How do you build your first AI content workflow, step by step?
This is the smallest workflow worth building. It produces one reviewable draft per run and takes roughly ten minutes to assemble.
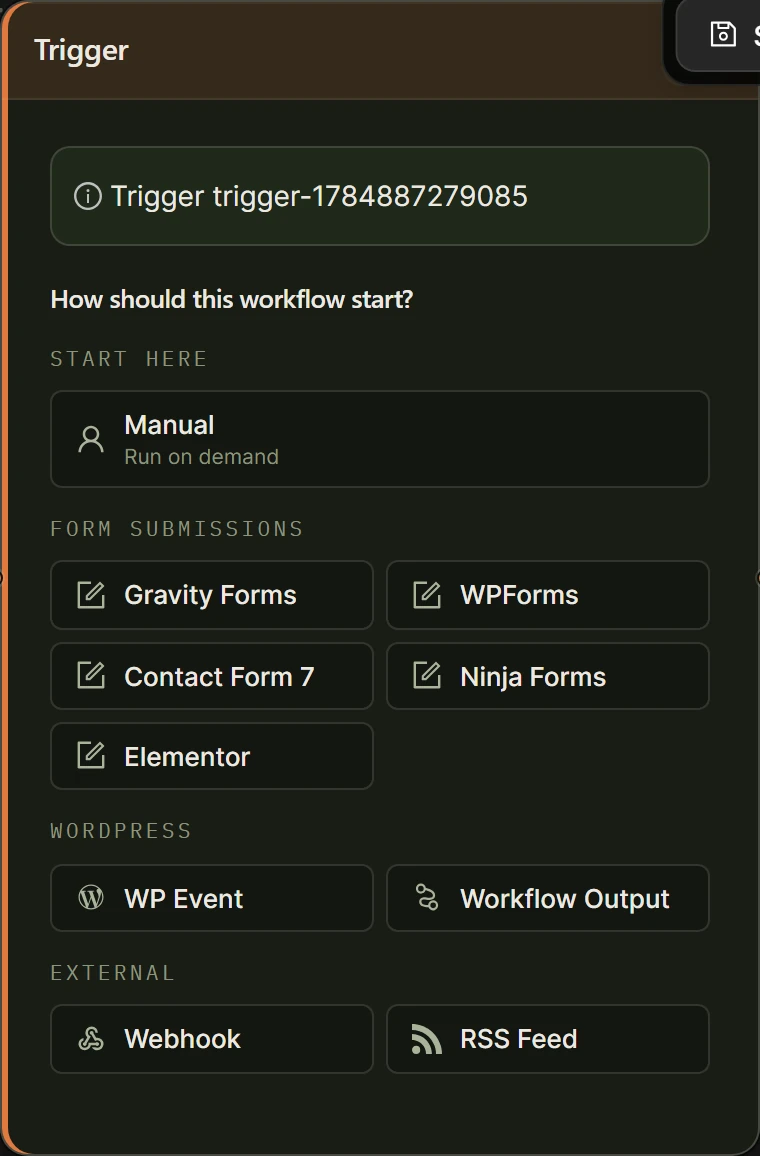
- Add a Trigger node. Choose Manual while you build. Manual lets you click Run in the builder, which is the only sane way to test.
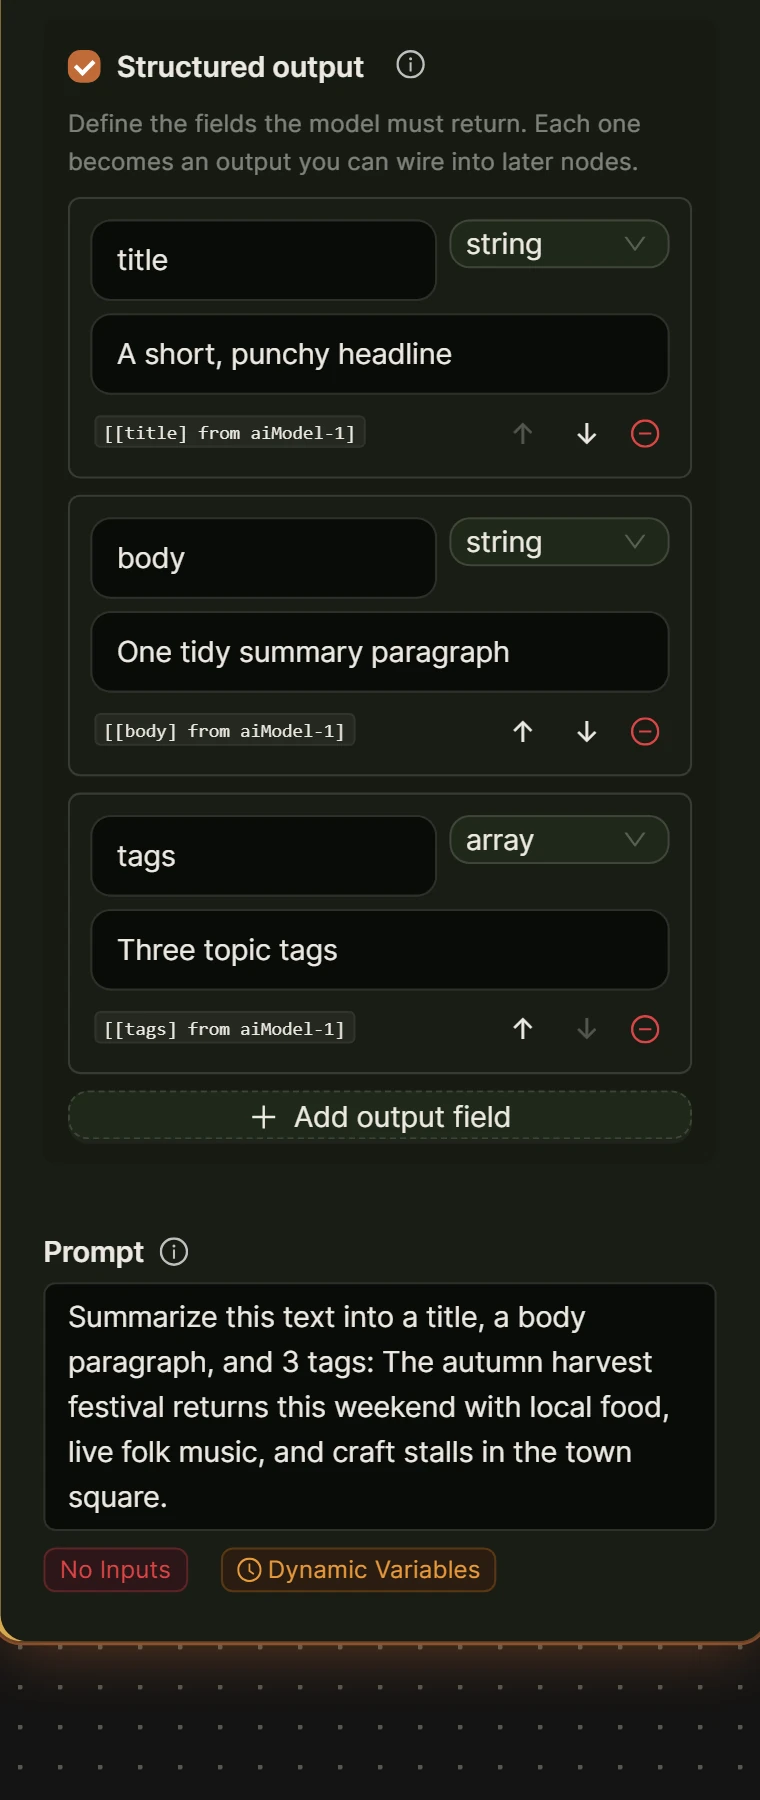
- Add an AI Prompt node for the brief. Turn on Structured output and define three fields:
title,angle, andkeywords. These become addressable as[[title] from ai-1]and so on. - Add the Write Article node. In the Content field, pass the angle and keywords with variable tags, set Word count to your target, and put your house style in Writing style. Be specific: “second person, no marketing adjectives, one idea per paragraph” beats “engaging and professional”.
- Add the Optimize SEO node. Feed it the article output and your target keywords. It rewrites the text to target that keyword set.
- Add a Human Input node. Set it to Modification Required and assign it to your editor role. The workflow now pauses here until a human submits.
- Add the Create Post/Product node. Set Post type to
post, leave Post status at draft, and mappost_titleto[[title] from ai-1]andpost_contentto the article output. The node returns the created post ID and permalink and costs 0 credits. - Run it and read the output. Not skim. Read it. The first run tells you whether your prompt or your word count is wrong, and both are cheap to fix before you schedule anything.
How do you keep quality high when AI writes the draft?
The single most important setting in the whole workflow is Post status, and it should stay at draft. The Create Post/Product node defaults to draft for exactly this reason. Everything else in this section is secondary to that one choice.
Google’s position supports this. In Google Search’s guidance about AI-generated content, published February 2023, Google states that its ranking systems reward original, high-quality, people-first content however it is produced, and that using automation primarily to manipulate search rankings violates its spam policies. The production method is not the problem. Unreviewed volume is.
Four practices that make the difference in my own use:
- Give the model something it cannot know. Feed in your own data, a customer question, or a support transcript. A prompt containing only a keyword produces a page that reads like every other page on that keyword.
- Put the style rules in the Writing style field, not the topic field. Keeping them separate means you can change the topic without re-teaching your voice each run.
- Use the Human Input node as a real gate. Approval Required gives an editor Approve and Revert buttons that branch the workflow. Modification Required lets them edit the text in place before it continues.
- Cap the volume deliberately. Two reviewed posts a week beat fourteen unreviewed ones, and the second option is what Google’s scaled content abuse policy targets.
Automation should remove the copying and pasting, not the editing. The moment it removes the editing, you have built a liability with a publish button.
How do you add images and SEO automatically?
Images come from one of two nodes. The Media Generator node produces an original image from a prompt, and the Unsplash Image node searches stock photography. Either output URL can be mapped to the featured image on the Create Post/Product node, which sideloads the file into your media library and sets it as the post thumbnail.
One limitation to plan around: the Unsplash Image node is local-only, so a workflow using it cannot run on the hosted cloud engine. If you intend to run a content workflow in cloud mode, use the Media Generator node instead.
For SEO, the Optimize SEO node rewrites text against a keyword set. Anything beyond that (meta titles, descriptions, schema) is best produced as named fields on an AI Prompt node with Structured output enabled, then mapped into your SEO plugin’s custom fields through the Create Post/Product node’s Field mappings, which also cover custom fields and ACF fields.
Worth knowing before you optimise for clicks alone: Seer Interactive’s analysis of queries showing an AI Overview found organic click-through rate fell 61%, from 1.76% to 0.61%, across 3,119 informational queries, before recovering from a 1.3% floor in December 2025 to 2.4% in February 2026. Structure your posts so a passage can be lifted cleanly, not just so a title can be clicked.
How do you schedule recurring AI posts in WordPress?
There is no schedule trigger type in AI Workflow Automation. Scheduling is set at the workflow level, not as a node you drag onto the canvas. You build the workflow with a Manual trigger and then set its schedule from the workflow settings, exactly as documented in Execution and Scheduling.
Your other recurring option is the RSS trigger, which polls a feed on an interval you choose, from every 5 minutes up to every 24 hours, and runs once per new item. This is the right choice when the content should follow a source rather than a calendar.
Each workflow also runs in one of two modes. Local is the default, is free, and runs on your own server. Cloud runs on the hosted engine, which matters for frequent or long-running schedules because your server’s PHP execution time stops being the constraint. Cloud is unavailable when a workflow contains local-only nodes such as the Chatbot, Create File, Unsplash, or Google Sheets output nodes.
If your posts should publish at a fixed future date rather than immediately, set Post status to future on the Create Post/Product node and supply the Scheduled date field.
Where does AI autoblogging go wrong, and how do you avoid it?
I have seen the same five failures repeatedly, and all of them are configuration choices rather than model limitations.
- Publishing straight to live. Someone changes Post status from draft to publish “just to test” and forgets. Leave it at draft and let the Human Input node be the only path to publish.
- One AI node feeding every field. Wiring a single plain text output into
post_title,post_content, and the excerpt produces a title that is the first sentence of the article. Use Structured output. - No unique input. A workflow whose only input is a keyword generates interchangeable pages. Feed it your data.
- Scheduling before testing. A workflow that runs hourly and has never been read once will produce dozens of drafts with the same structural flaw.
- Ignoring cost until the bill arrives. A 1,000-word Write Article run plus an SEO pass is inexpensive per post, but multiply it by an hourly schedule and it stops being inexpensive. Set the schedule to the cadence you can actually edit.
Frequently asked questions
Can WordPress automatically generate blog posts with AI?
Yes. With AI Workflow Automation you build a workflow that triggers on a schedule, an RSS item, a webhook, or a WordPress event, generates the article with the Write Article node, and files it with the Create Post/Product node. Post status defaults to draft, so nothing reaches your readers until a human approves it.
Will AI-generated blog posts hurt my SEO?
Not automatically. Google states that its ranking systems reward original, high-quality, people-first content however it is produced, and that automation becomes a spam policy violation only when used primarily to manipulate rankings. Unreviewed, high-volume output is what gets penalised, so keep a human review gate in the workflow.
How do I schedule an AI blog post workflow in WordPress?
AI Workflow Automation has no schedule trigger node. You set the schedule at the workflow level, then run it on demand from the builder or the Workflows list while testing. For source-driven publishing, the RSS trigger polls a feed on an interval between 5 minutes and 24 hours and runs once per new item.
How much does it cost to automate blog posts with AI?
The plugin is free, so your cost is the AI provider’s API usage plus your hosting. Because you connect your own OpenAI, Anthropic, or OpenRouter key, you pay list rates directly with no per-post platform markup. The Create Post/Product node itself costs 0 credits, and local execution costs nothing beyond your server.
Where to go next
Install AI Workflow Automation from the WordPress.org plugin directory and build the seven-node workflow above with a Manual trigger before you schedule anything. The content creation library has further walkthroughs for research, summarisation, and social distribution built on the same nodes.