To let a Manus AI agent read from or write to your WordPress site, the agent needs authenticated access to the WordPress REST API. That means three things: an application password created in WordPress, those credentials stored as environment variables the agent reads at run time, and a staging site to test against before the agent touches anything live. All three use standard WordPress features, so you do not need an extra plugin or any custom code.
The short version:
- Create an application password for the agent under Users in your WordPress dashboard.
- Store the site URL, your username, and that application password as environment variables the agent reads.
- Point the agent at a staging site first, confirm a read call succeeds, then allow writes.
Each step is covered in full below. After that comes the other half of this article: the experiment we ran building a Manus-style general AI agent inside WordPress itself, using our plugin, AI Workflow Automation.
Connecting Manus to WordPress: Credentials and Environment Variables
Here is each of the three steps in full, with the screens and the exact values involved.
1. Create WordPress REST API credentials (application password)
WordPress ships with Application Passwords, the recommended way to give an external agent API access without sharing your main login. In your WordPress dashboard go to Users, open your profile, scroll to Application Passwords, enter a name such as “Manus Agent”, and click Add. WordPress shows a 24-character password once, so copy it right away because it is not displayed again. Your credentials are your WordPress username plus this application password, sent as HTTP Basic Auth to endpoints under https://your-site.com/wp-json/wp/v2/.
Application Passwords require HTTPS and can be turned off by some hosts or security plugins. If the section is missing, enable it or use a REST authentication plugin that issues API keys or JWT tokens instead.
2. Store the credentials as environment variables for the Manus agent
Never hard-code credentials into a prompt or a shared file. Give your Manus agent the values as environment variables so they stay out of your workflow logic. A common pattern looks like this:
WORDPRESS_API_URLset tohttps://your-site.com/wp-json/wp/v2WORDPRESS_USERNAMEset to your WordPress user loginWORDPRESS_APP_PASSWORDset to the application password from step 1
The agent reads these variables at run time and builds the Authorization header from them. Keeping the base URL in a variable also lets you point the same agent at a staging site or your live site by changing a single value.
3. Test on a staging WordPress site first
Before you let an agent write to your live site, point it at a disposable test or staging WordPress install. Create a fresh WordPress site (a local install or a free staging environment from your host), generate a separate application password there, and run the agent against that base URL. Confirm the agent can authenticate with a read call such as GET /wp-json/wp/v2/posts, then try creating a draft before you enable publishing. Once the workflow behaves as expected, switch the WORDPRESS_API_URL variable to your production site.
Running the agent inside WordPress instead
Pointing an outside agent at the REST API is one approach. The other is to run the agent on the site itself, where it already has access to your content and does not need credentials at all. That is what the rest of this article covers, built with the free AI Workflow Automation plugin on wordpress.org.
The two approaches also meet in the middle. On WordPress 7.0 you can publish your workflows as core Abilities and over the MCP Adapter, so an outside assistant can list them and run one on request without you wiring up REST calls by hand. See Expose Workflows to AI Agents in the documentation. It is off by default and administrator only.
What is an AI agent?
An AI agent is a software program that uses artificial intelligence to perform tasks or make decisions based on data inputs. Think of it as a virtual assistant that can automate processes, analyze information, and interact with users. AI agents can handle a variety of functions, such as responding to customer inquiries, generating content, processing data, and more, depending on how they’re programmed.
In the context of the AI Workflow Automation plugin, an AI agent can be created by setting up workflows that define how the agent should respond to different inputs and what actions it should take. This allows website owners to streamline operations and enhance user interactions on their sites.
What is Manus.im (General AI agent) and Why Is Everyone Talking About It?
Manus describes itself as “a general AI agent that bridges minds and actions: it doesn’t just think, it delivers results.” The company claims their agent can handle various tasks for work and life, completing them while you rest.
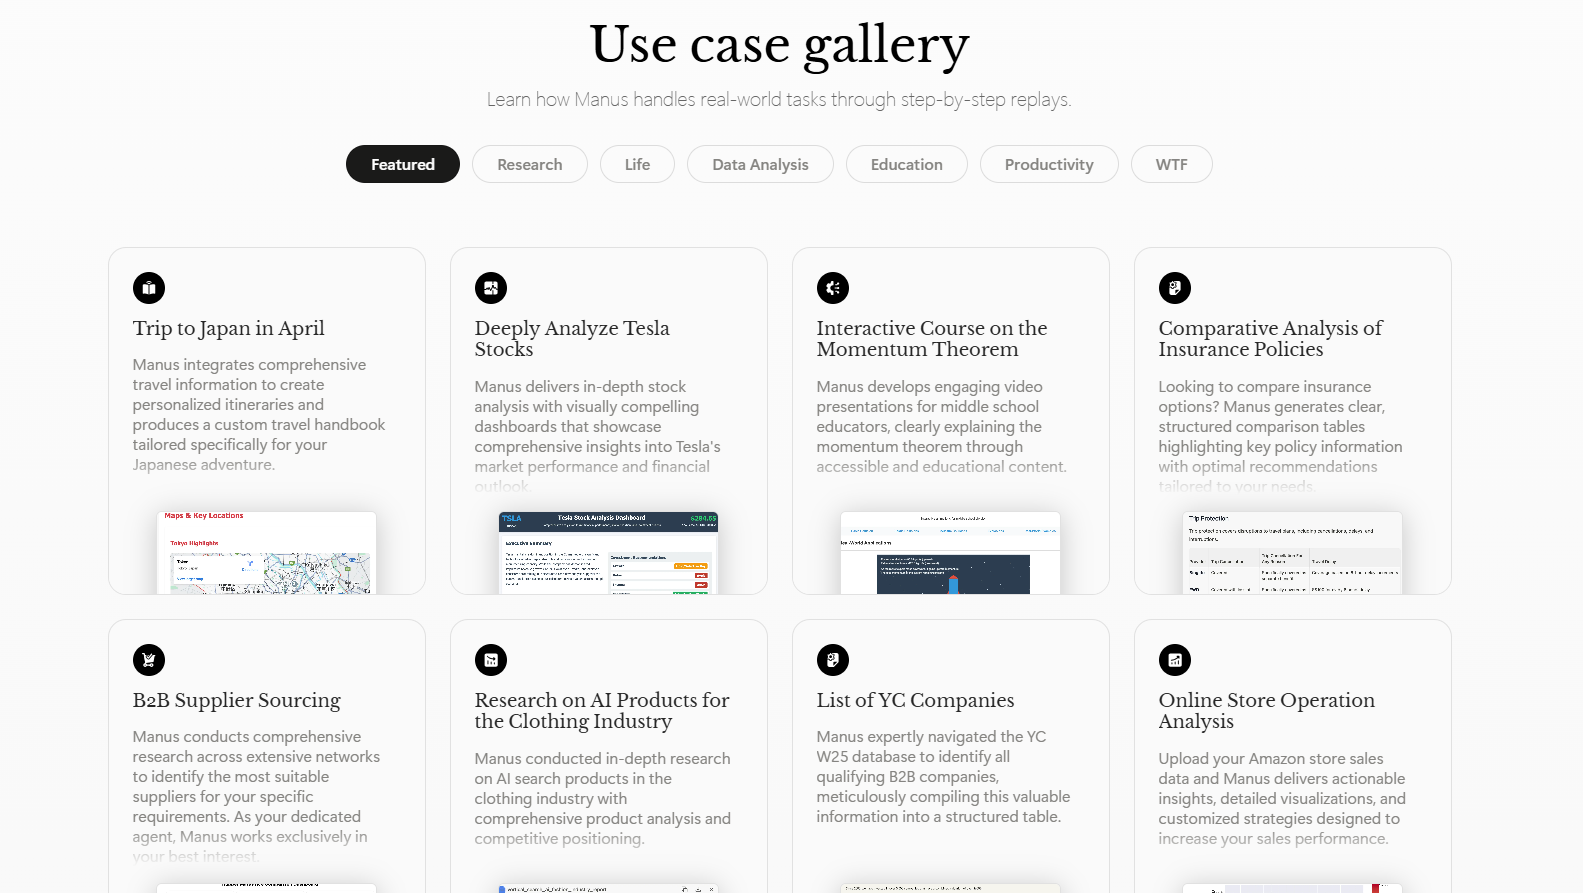
After testing it out, we confirmed what many suspected: it’s essentially a chain of AI models (Claude Sonnet and Qwen) with function calling capabilities. It’s impressive, but not something that can’t be replicated with the right tools.
Building Our Own General AI agent Version: Meet “M-anus”
As an experiment, we decided to build our own general AI agent using our AI Workflow Automation plugin for WordPress. We affectionately named it “M-anus” (a playful riff on the original).
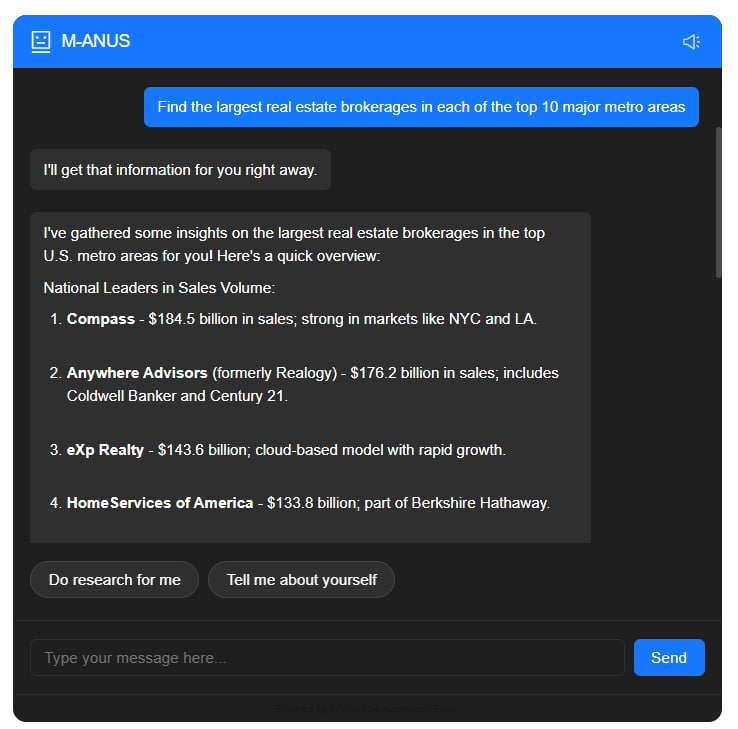
The setup process was surprisingly straightforward:
- We created a new workflow in our plugin
- Added a Chatbot node as the main interface
- Defined action capabilities for the bot to perform
- Connected research capabilities using the Perplexity API
- Used Claude 3.7 Sonnet for content generation
- Added GPT-4o for title generation and refinement
The Workflow Structure
Here’s what our workflow looks like in the builder:
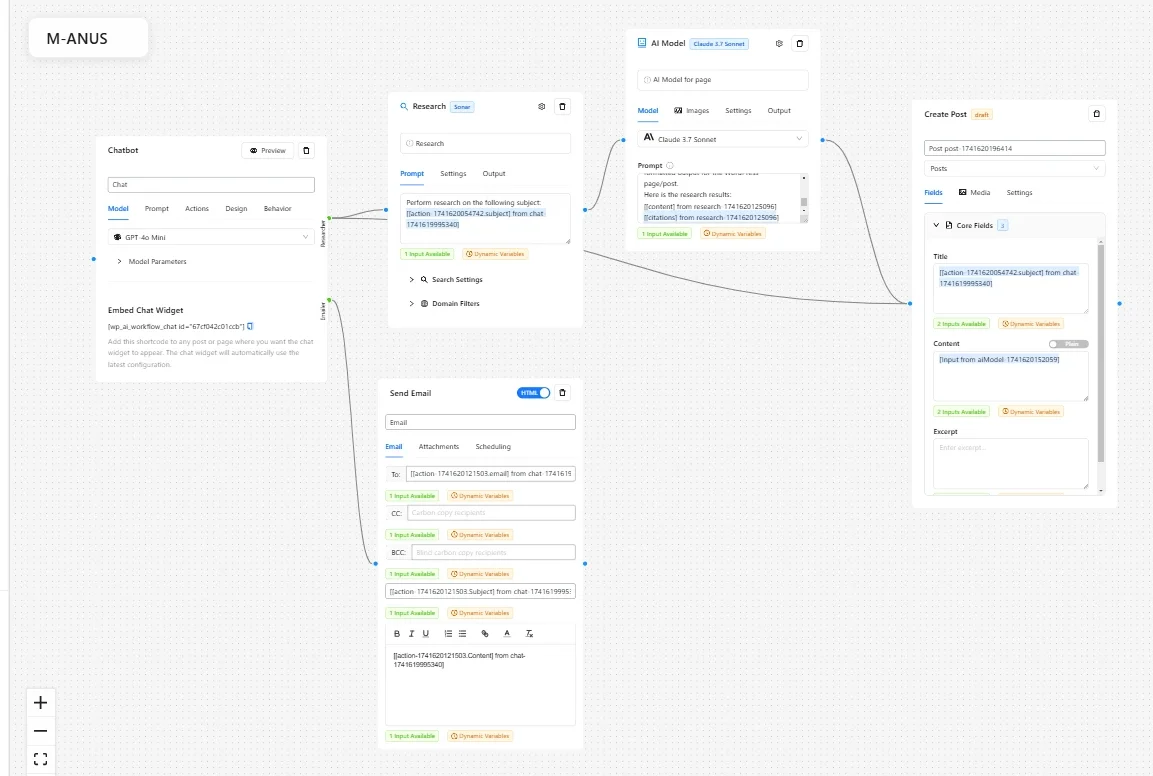
The workflow follows a simple pattern:
- The user interacts with a chatbot interface
- When specific actions are requested, the bot triggers the appropriate workflow
- The workflow collects information, conducts research, and delivers results back to the user
Testing M-anus Against General AI Agent Of Manus.im
To see how our creation measured up, we took prompts directly from Manus.im’s official examples and ran them through our system.
For instance, we asked both systems to research “the largest real estate brokerages in the top 10 major metro areas.”
General AI agent Manus.im Result:
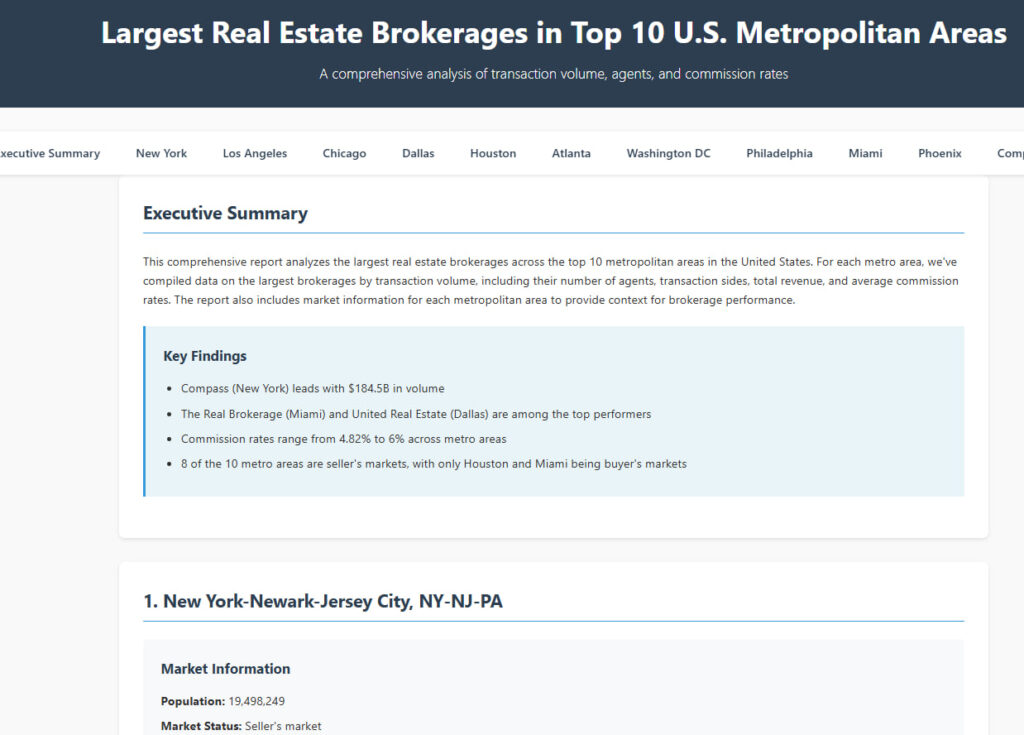
Our M-anus Result:


As you can see, both systems delivered comprehensive reports with similar information. In some ways, our system provided more detailed regional breakdowns.
How It Works Behind the Scenes
When a user sends a message to M-anus, here’s what happens:
- The Chatbot node analyzes the request to determine intent
- If research is needed, it triggers the Research node with Perplexity API
- The results are sent to Claude 3.7 Sonnet to structure and expand the content
- GPT-4o helps refine titles and headings
- A new post is generated using the Post Node automatically
- The results are delivered back to the user
We can even track the cost and performance of each component:
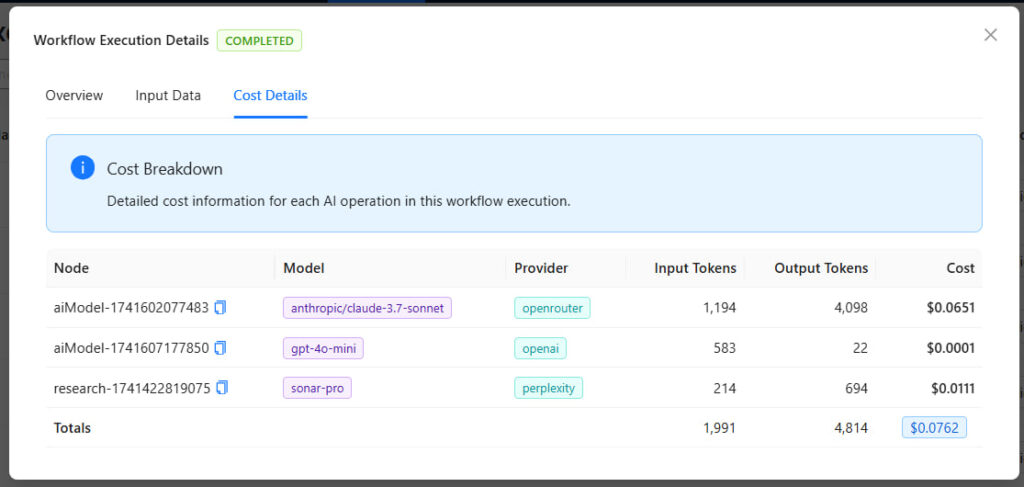
The entire process for our real estate example cost just $0.0762 in API calls, which is efficient for the value delivered.
Why WordPress Makes This Even Better
The key advantage of building this in WordPress with our plugin is that we don’t need to waste tokens generating UI elements. WordPress already provides:
- A ready-made front-end interface
- User authentication
- Content storage and management
- The ability to publish results as posts or pages
- Email capabilities built-in
Build Your Own General AI Agent
The exciting part is that anyone using our AI Workflow Automation plugin can build their own general AI agent. No coding required, just drag and drop nodes in our visual workflow builder.
Here’s what you’ll need:
- WordPress site
- Our AI Workflow Automation plugin
- API keys for your preferred AI models (OpenAI, Anthropic, etc.)
- A clear idea of what tasks you want your agent to perform
The Chatbot node with its Actions feature is particularly powerful. You can define specific actions your agent can perform, such as:
- Researching topics
- Creating content
- Sending emails
- Posting to social media
- Analyzing data
- And much more
You can download M-anus as a template or a starting point and build on that:
- Download the workflow from this link
- Install the free AI Workflow Automation plugin from wordpress.org
- Open a new workflow, and on the bottom left click on Import/export workflow
- Drag and drop the workflow you just downloaded to that box
- Save the workflow and start experimenting with M-anus
Final Thoughts
While companies like Manus.im are making headlines with their general AI agents, the technology to build similar systems is increasingly accessible. Our experiment shows that with the right tools, anyone can create powerful AI agents without extensive coding or infrastructure.
AI Workflow Automation brings this capability to WordPress, allowing businesses and creators to build custom AI agents tailored to their specific needs.
Have you tried building your own AI agent? Let us know in the comments.
Want to build your own general AI agent like M-anus? Install AI Workflow Automation from wordpress.org, then follow the step-by-step guide to building a workflow.
Frequently Asked Questions
How do I use agent and Manus environment variables for WordPress?
Store your WordPress base URL, username, and application password as environment variables (for example WORDPRESS_API_URL, WORDPRESS_USERNAME, and WORDPRESS_APP_PASSWORD) and have the Manus agent read them at run time to authenticate against the WordPress REST API. This keeps credentials out of your prompts and lets you switch between a test site and your live site by changing one variable.
How do I use the WordPress API with Manus agent credentials?
Create an application password under Users in your WordPress dashboard, then send your username and that password as HTTP Basic Auth to REST endpoints under /wp-json/wp/v2/. Start with a read request such as listing posts, then move on to creating drafts once authentication works.
How do I test a WordPress site for Manus AI agents?
Use a staging or local WordPress install with its own application password, point the agent’s base URL at it, and verify that a read call succeeds before you allow any writes. Testing on a throwaway site protects your live content while you confirm the agent behaves correctly.