An AI customer service agent for WordPress answers support questions from your own content and escalates to a human when needed. AI Workflow Automation, a free WordPress plugin, builds one visually: it grounds replies in your docs and FAQs, resolves routine questions automatically, and hands off to a team member for anything it cannot confidently answer, all inside your site with your own API keys.
I build the plugin and I answer its support queue, so I have run this on both sides. The thing that separates a support agent people like from one they complain about is not the model. It is how narrowly you scope what it is allowed to answer, and how fast it gives up.
AI Workflow Automation is a free WordPress plugin with a visual drag-and-drop builder that runs AI workflows, agents, and chatbots inside your own site, using your own API keys, with no external subscription required.
What should an AI support agent do, and what should it not?
An AI support agent should handle the repetitive, factual, well-documented half of your queue: shipping timelines, return windows, password resets, order status, plan differences, “where do I find X” questions. These are questions with one correct answer that already exists in writing somewhere on your site.
It should not handle anything where being wrong is expensive. Billing disputes, cancellations, complaints, anything legal or medical, and anything involving an angry customer belong with a person. Zendesk defines an automated resolution as one that completes the issue end to end, uses correct and current information, avoids escalation, and needs no follow-up (Zendesk). By that definition, half-answering a refund question is not a resolution. It is a deferred complaint.
Deflection rates vary far more by question type than by product, which is why published averages are near useless for planning. Look at your own queue, count how many tickets are already answered by a document you published, and that number is your realistic ceiling.
A support bot that says “I do not know, let me get someone” is a good bot. A support bot that invents a return policy is a liability with a chat bubble.
How do you ground the agent’s answers in your own help content?
You ground answers with retrieval-augmented generation, which retrieves relevant passages from your own documents and puts them in the prompt before the model answers. The technique was introduced by Lewis et al. in Retrieval-Augmented Generation for Knowledge-Intensive NLP Tasks (2020), combining a language model with a searchable dense vector index.
In AI Workflow Automation the knowledge base works like this. Content is split into overlapping chunks, each chunk is converted to a vector using OpenAI’s text-embedding-3-small model, and the vectors are stored in your own Supabase project with the pgvector extension. At answer time the incoming question is embedded, the most semantically similar chunks are retrieved, and those passages are prepended to the prompt as a reference block with an instruction to decline if the answer is not there.
You create collections under Settings, Knowledge Base Management on the Supabase (RAG) tab, after a one-time setup that connects your Supabase credentials and runs the provided SQL. Three source types can be indexed:
- WordPress content. Posts, pages, or any custom post type. The title, rendered content, and permalink are stored, so the agent can cite the page it answered from.
- Pasted text. Direct text with an optional title, which is how I load internal policies that are not published anywhere.
- File uploads. TXT, MD, and CSV are indexed directly. PDF, DOC, DOCX, and RTF are converted first.
One practical warning: a knowledge base is only as current as the day you indexed it. If your refund policy changed in March and the index still holds the January version, the agent will answer confidently, wrongly, and at scale. Re-index whenever the underlying documents change.
How do you build the support agent step by step?
Here is the full build. On a site that already has a provider API key in Settings, this takes about twenty minutes.
- Index your help content first. Go to Settings, Knowledge Base Management, create a collection called something like “support-docs”, and add your documentation post type, your FAQ page, and your policy pages. Build this before you build the agent, because everything downstream depends on it.
- Create a workflow and add a Chatbot node. It sits in the Communication group of the node palette. Every chat node in AI Workflow Automation is an agent; there is no agent-mode toggle to find.
- On the Model tab, choose your AI source and model. My API keys routes through the OpenAI, Anthropic, or OpenRouter key configured in Settings and costs you only provider usage. Credits uses the keyless metered proxy on a connected account. Then enable Knowledge base and select the collection you just built.
- Write the system prompt on the Instructions tab. This is where the agent’s discipline lives. Mine reads roughly: “You are the support assistant for [company]. Answer only from the provided reference passages. If the passages do not contain the answer, say you are not sure and offer to connect the visitor to a person. Never guess at prices, dates, or policy terms. Keep answers under 120 words.”
- Add Actions on the Actions tab if the agent needs to do things rather than only answer. Each action creates a connectable output handle, so “check order status” can trigger a downstream API Call node. The capabilities table on this tab lets you enable each tool, require approval before it runs, and set a rate limit.
- Turn on handoff on the Handoff tab. Details in the next section. Do this before you deploy, not after the first complaint.
- Set the Behavior tab. Configure the initial message, turn on source citations so visitors can click through to the page an answer came from, enable file uploads if support requires screenshots, and set a rate limit.
- Style it on the Design tab (theme, position, colors, typography, quick replies), save the workflow, and place the generated shortcode on the pages where support questions actually get asked.
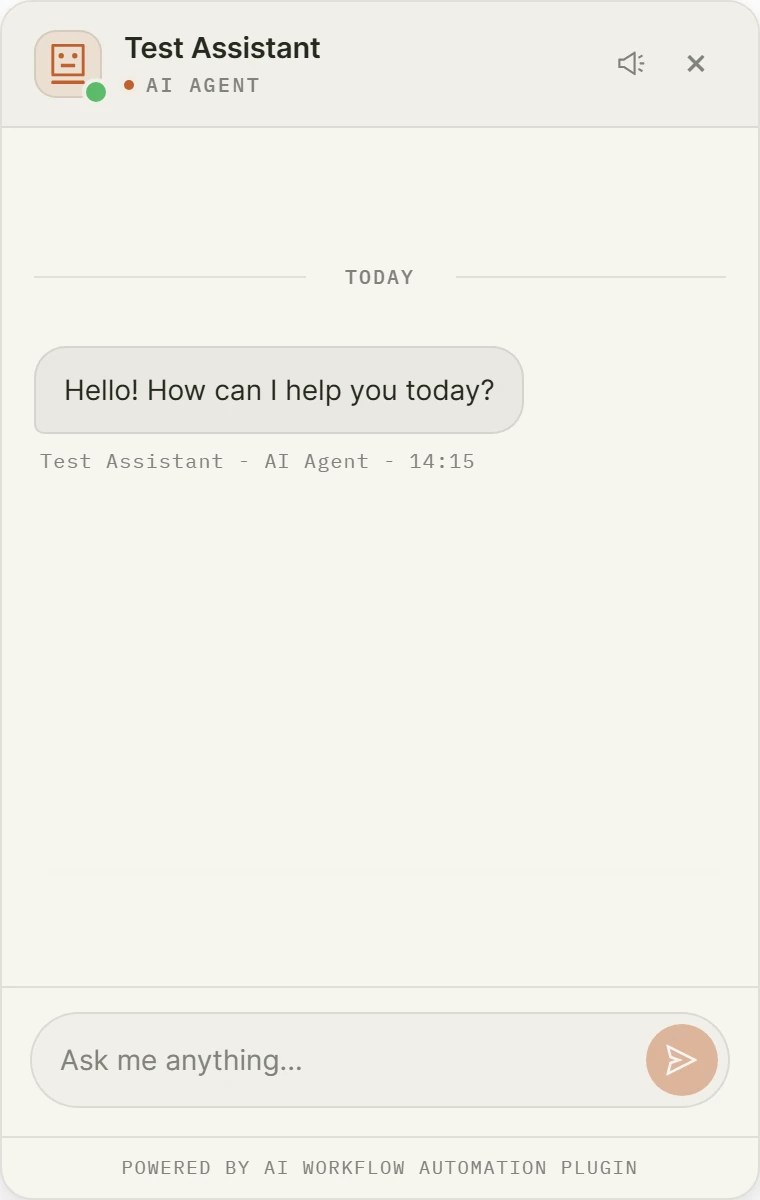
The Chatbot node is local-only, meaning it runs on your WordPress server rather than a hosted service. You can see a working example on the AI Customer Service Chatbot demo, which combines a form input, a document parser over the support knowledge base, and the chat agent.
When should the agent escalate to a human?
The agent should escalate whenever it cannot answer from its sources, whenever the visitor asks for a person, and whenever the topic is on your do-not-automate list. Configure all three on the Handoff tab.
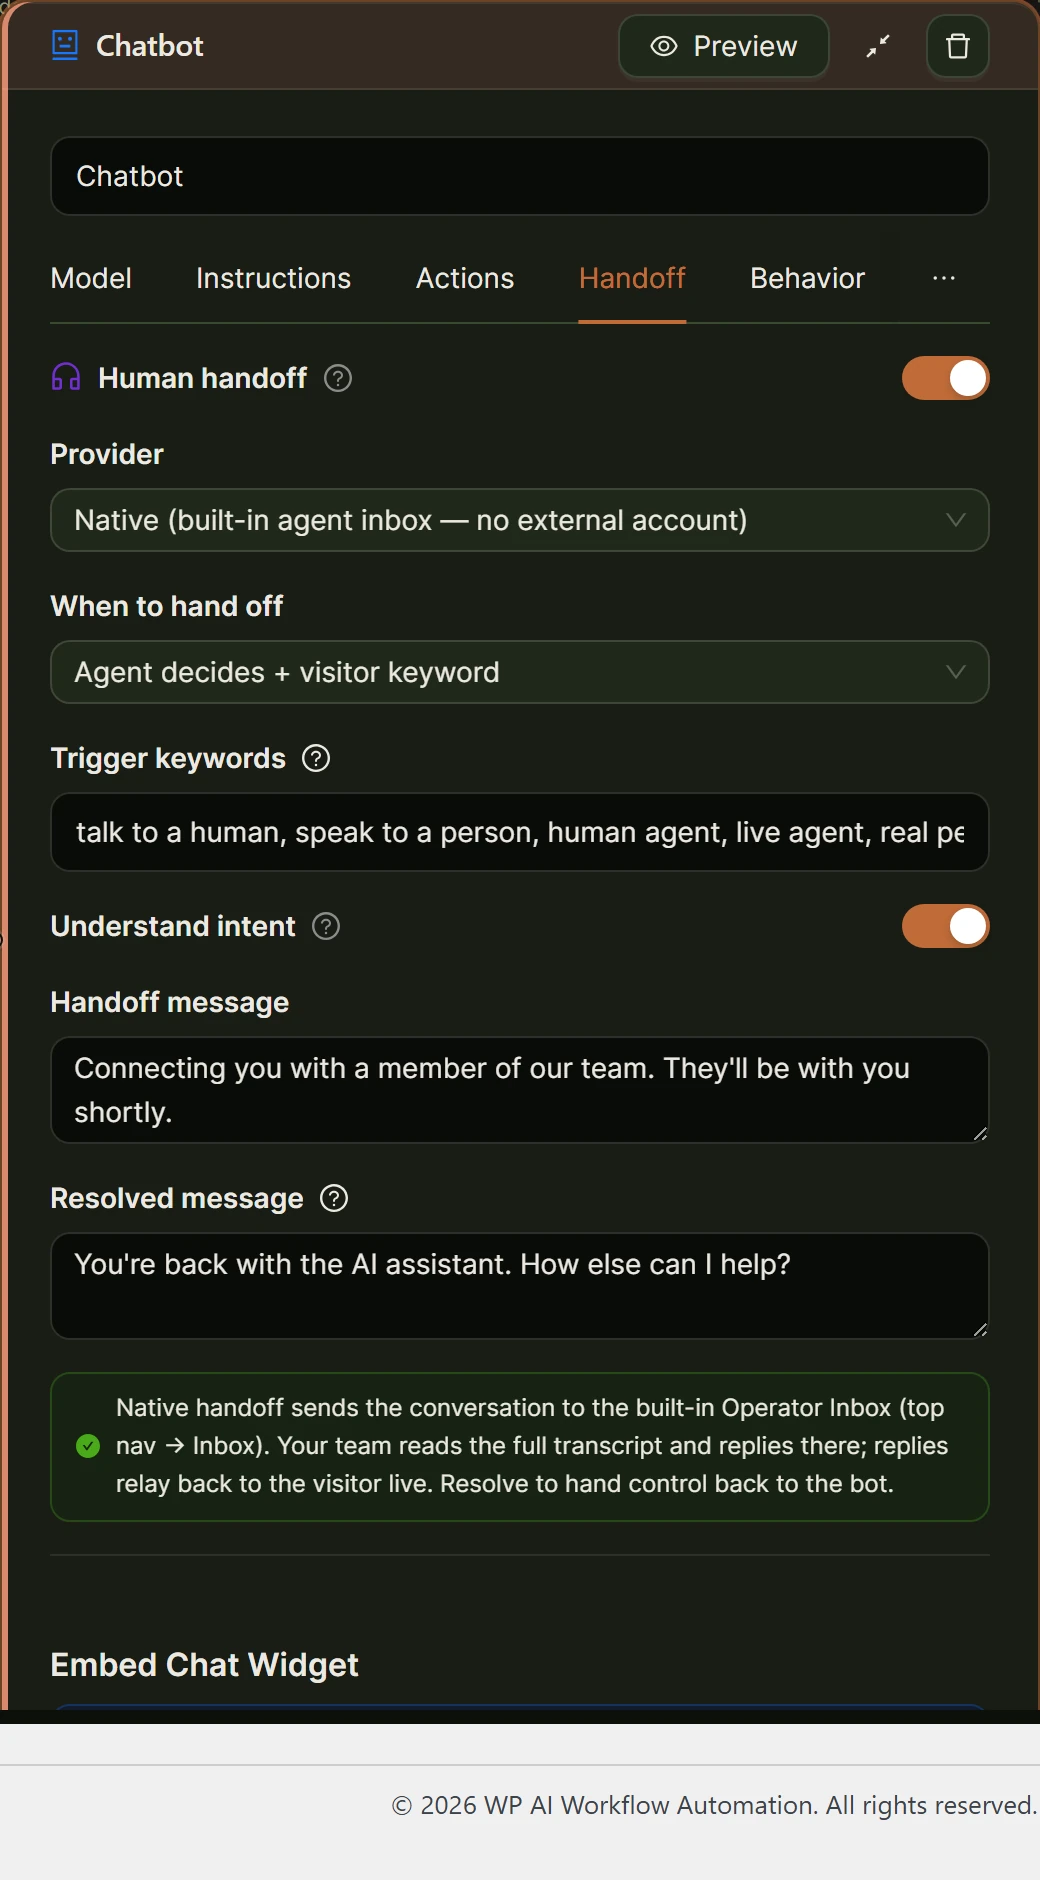
Handoff is off by default and has to be turned on deliberately. Once enabled you choose a Provider: Native, which is the built-in agent inbox and needs no external account, or Chatwoot, Zendesk Sunshine Conversations, or Intercom if you already run one of those.
Then you choose When to hand off, and the three options matter:
| Trigger mode | What starts a handoff | Use it when |
|---|---|---|
| Agent decides + visitor keyword | Either the agent judges it cannot help, or the visitor uses a trigger phrase | Default. Covers both directions. |
| Agent decides only | The agent calls the handoff tool itself | You want the agent to gate escalation |
| Visitor keyword only | The visitor’s message matches your keyword list | You want escalation strictly under visitor control |
The default Trigger keywords list is “talk to a human, speak to a person, human agent, live agent, real person,” and it is editable. There is also an Understand intent toggle that catches requests phrased in the visitor’s own words, such as “can I speak to someone,” even without an exact keyword match. Keywords stay the fast path and the classifier runs only when a message looks like it might be asking for a person.
Two messages are worth writing carefully. The Handoff message is what the visitor sees when escalation starts, and the Resolved message is what they see when an operator finishes and control returns to the bot. While a human is in control, the agent stops answering and only relays messages, which is the behaviour you want: nothing is worse than a bot talking over your support rep.
How do you connect it to your inbox, Slack, or a ticketing app?
With Native handoff, waiting conversations land in the Inbox tab inside the AI Workflows admin screen, with a badge showing pending items. An operator picks up the conversation there and replies in real time. No external account, no per-seat fee.
With Chatwoot, Zendesk Sunshine Conversations, or Intercom, you enter that provider’s connection details on the Handoff tab and register the inbound webhook URL the panel displays. The conversation then appears in the tool your team already lives in.
For alerting rather than full handoff, connect a Send Email node or an API Call node to an action output handle. A “notify support” action posting to a Slack incoming webhook takes three minutes to add and gives you a live feed of every escalation.
For anything needing sign-off before it happens, such as issuing a credit, route the action through a Human Input node set to Approval Required. The workflow pauses, a task appears under the Tasks menu, and nothing executes until a person approves it.
How do you measure whether the agent is actually working?
Track four numbers, and start collecting them before launch so you have a baseline.
- Containment rate. Conversations that ended without a handoff, divided by total conversations. This is your headline number, but it is only meaningful next to number two.
- Resolution rate. Conversations where the visitor’s problem was actually solved. Containment counts conversations that did not reach a human, which includes people who gave up. Those are opposite outcomes that look identical in a containment chart.
- Escalation quality. Of the conversations that escalated, how many should have escalated sooner? Read twenty transcripts by hand in week one. It is tedious and it is the highest-value hour you will spend.
- First-contact resolution. Zendesk’s 2026 CX Trends Report found 85 percent of CX leaders say customers will drop brands that cannot resolve issues on first contact, regardless of channel. A fast wrong answer is worse than a slow right one.
Who can see the conversation data?
With AI Workflow Automation, conversations are stored in your WordPress database and model calls go from your server to the provider whose key you configured. There is no intermediate vendor holding transcripts, because the plugin runs the chat node locally rather than proxying through a hosted service.
That leaves three obligations, and they are yours either way. Your AI provider processes the message content, so check their data-retention terms and use a business agreement if you handle regulated data. Your knowledge base lives in your own Supabase project, so its access controls are your responsibility. And if visitors can type personal data into the widget, your privacy policy has to say what happens to it, which is a GDPR requirement rather than a nice-to-have.
For the full feature overview rather than the build, see the AI Chatbot for WordPress page.
Frequently asked questions
Can an AI chatbot answer questions from my own website content?
Yes. AI Workflow Automation indexes your posts, pages, custom post types, pasted text, and uploaded files into a knowledge base stored in your own Supabase project. At answer time it embeds the visitor’s question, retrieves the most similar passages, and instructs the model to answer only from those passages and decline if the answer is not present. Enable it on the Chatbot node’s Model tab by selecting a knowledge base collection.
How does an AI support agent know when to hand off to a human?
Three ways, configured on the Chatbot node’s Handoff tab. The agent can decide itself by calling its handoff tool when it cannot answer. The visitor can trigger it with a keyword such as “talk to a human.” And an intent classifier can catch requests phrased in the visitor’s own words without an exact keyword match. The default mode combines agent-decided and keyword triggers.
What percentage of support tickets can AI actually resolve?
It depends far more on question type than on the tool. Questions with one documented answer, such as order status, password resets, and return windows, deflect at high rates. Nuanced complaints, billing disputes, and anything requiring judgment barely deflect at all. Rather than trusting a published average, count how many tickets in your own queue are already answered by something you have published. That is your realistic ceiling.
Where is chat data stored with a self-hosted WordPress AI agent?
In your own WordPress database. AI Workflow Automation runs the Chatbot node locally on your server, so conversations are not proxied through a third-party vendor. The message content does go to whichever AI provider’s API key you configured, such as OpenAI or Anthropic, and knowledge base vectors live in your own Supabase project. Review your provider’s retention terms and disclose the processing in your privacy policy.
Build one on your own site
Install AI Workflow Automation from the WordPress plugin directory, index your ten most-linked help pages, add a Chatbot node with that knowledge base selected, turn on Native handoff, and put the shortcode on your support page. Run it for a week with escalation set generously, read the transcripts, then tighten.
The customer service chatbot demo is live if you would rather try one before building it.