To build an AI agent in WordPress without code, you use a visual builder to give the agent a goal, connect the tools it can use, and set guardrails. AI Workflow Automation, a free WordPress plugin, does this with drag-and-drop nodes: you define instructions, connect apps and your site’s data, add a human-approval step, and the agent runs entirely inside WordPress.
I build these for a living, and the part people underestimate is not the AI. It is deciding what the agent is allowed to touch. AI Workflow Automation is a free WordPress plugin with a visual drag-and-drop builder that runs AI workflows, agents, and chatbots inside your own site, using your own API keys, with no external subscription required. This guide covers the build and the guardrails together, because an agent without guardrails is just a fast way to make mistakes.
What is a WordPress AI agent, and how is it different from a chatbot?
An AI agent is a system that pursues a goal by choosing its own actions, rather than following a fixed script. IBM defines an AI agent as a system or program capable of autonomously performing tasks on behalf of a user or another system, and the working pattern is a think-act-observe loop: the agent decides on an action, takes it, reads the result, and decides again.
Anthropic draws the useful line for builders. In Building Effective AI Agents, published December 2024, workflows are described as “systems where LLMs and tools are orchestrated through predefined code paths”, while agents are “systems where LLMs dynamically direct their own processes and tool usage, maintaining control over how they accomplish tasks”.
That distinction matters more than the marketing use of the word. Here is how the three things people call “an AI agent” actually differ inside WordPress.
| Chatbot | Workflow | Agent | |
|---|---|---|---|
| What it does | Answers questions | Runs fixed steps in order | Chooses actions to reach a goal |
| Who decides the path | No path, one reply | You, at build time | The model, at run time |
| Uses tools | Optional retrieval | Yes, in a set sequence | Yes, picking which and when |
| Handles surprises | Poorly | Fails or branches | Adapts, within its permissions |
| Right for | FAQs and support answers | Repeatable, predictable jobs | Tasks with many possible routes |
| Main risk | Wrong answer | Wrong output | Wrong action taken for real |
That last row is the honest reason to think before reaching for an agent. A wrong chatbot answer embarrasses you. A wrong agent action sends an email, refunds an order, or publishes a post.
What are the no-code building blocks?
Every agent in AI Workflow Automation comes down to three parts, and you configure all three in the same node.
The goal. This is the system prompt on the Instructions tab: who the agent is, what outcome it is responsible for, and what it must never do. Write it as a job description, not a wish. “You handle pre-sales questions about our plans and log every qualified lead. You never quote a price that is not on the pricing page, and you never promise a delivery date.”
The tools. These are the actions the agent can take, listed on the Actions tab as a capabilities table. Anything not in that table is impossible for the agent, which is the point. Start with fewer tools than you think you need.
The guardrails. Each capability in that table has its own enable toggle, an approval requirement, and a rate limit. That is where you decide which actions run freely, which pause for a human, and how often any of them can fire.
If you have never built a workflow in the plugin before, run through the step-by-step workflow guide first. Fifteen minutes there makes the rest of this obvious.
How do you build your first agent, step by step?
We will build a support agent that answers from your documentation, logs unresolved questions to a spreadsheet, and asks a human before it does anything else. Add your AI provider key in Settings before you start.
- Create the workflow. Open AI Workflow Automation in wp-admin, create a new workflow, and name it at the top so you can find it later.
- Drag the Chatbot node onto the canvas. This node is the agent. On the Model tab, choose your AI source and model, and attach a knowledge base so the agent retrieves passages from your own content each turn.
- Write the instructions. On the Instructions tab, state the role, the boundaries, and what to do when unsure. Add one line that matters more than the rest: “If you are not confident the answer is in the provided content, say so and hand off rather than guessing.”
- Give it tools. On the Actions tab, enable the capabilities the agent needs. Each enabled action creates a connectable output handle on the node, which you wire to the nodes that carry out the work.
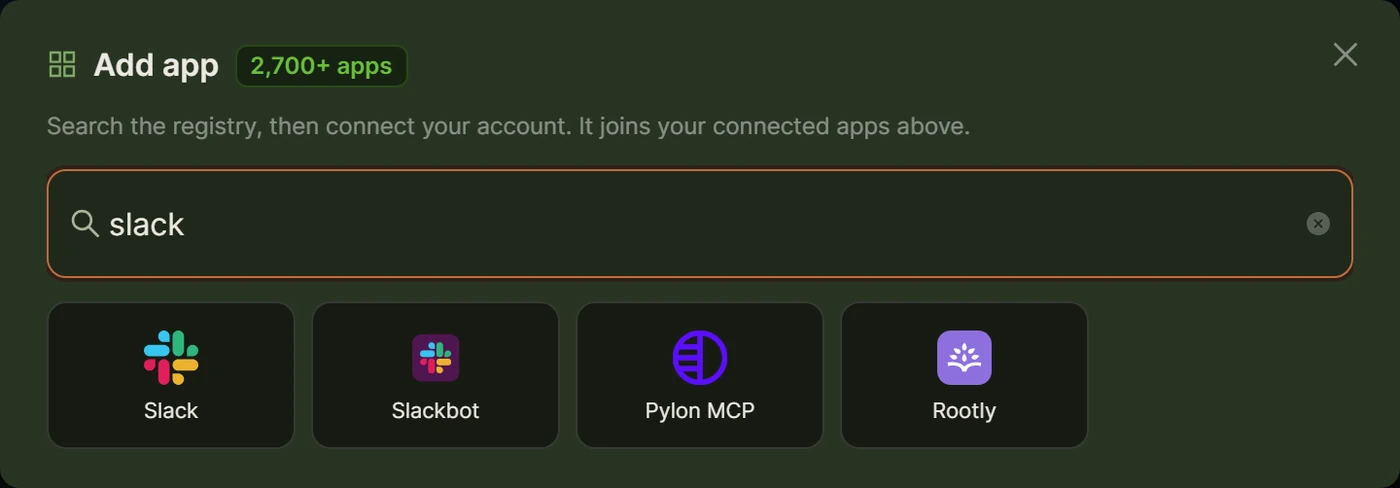
- Connect an external app. Drag a Connect an App node onto the canvas and wire it to one of those handles. Pick the app, pick the action, and fill the fields that load for it. This is how the agent reaches Google Sheets, Slack, Notion, Gmail and 2,700+ other applications.
- Add the approval gate. Drag a Human Input node in front of any action with real-world consequences, and set its input type to Approval Required.
- Set the handoff path. On the Handoff tab, choose where stuck conversations go: the plugin’s own Operator Inbox, or Chatwoot, Zendesk Sunshine Conversations, or Intercom if you already use one.
- Save and run. Click Save, then Run. The live execution panel opens on the right and shows each node as it fires, which is where you watch the agent’s reasoning turn into actions.
- Publish it. Copy the shortcode that appears on the node and paste it into a page.
How do you give it safe access to your site and apps?
Access is where agent projects either stay boring or become incidents. Three principles cover it.
Grant the narrowest action, not the broadest app. The Connect an App node exposes specific actions, so connect “add a row to this sheet” rather than granting general access and hoping the agent picks well. Narrow actions fail safely.
Keep credentials out of your WordPress database. App connections in AI Workflow Automation are handled through Composio, and those credentials are stored with Composio rather than on your site. A compromised WordPress install therefore does not hand over your Slack or Gmail tokens. You can disconnect any account from the node at any time.
Default writes to drafts. Where an agent creates content, point it at the Create Post/Product node with status set to Draft. The default in the plugin is Draft for exactly this reason, and I would leave it there for at least the first month.
One more habit worth adopting: give the agent read access widely and write access narrowly. Reading your documentation, your products, and your past tickets makes it useful. Writing to one spreadsheet and one draft post makes it safe.
How do you add human-in-the-loop approval?
The Human Input node is the pause button, and it is the single most valuable node in an agent build.
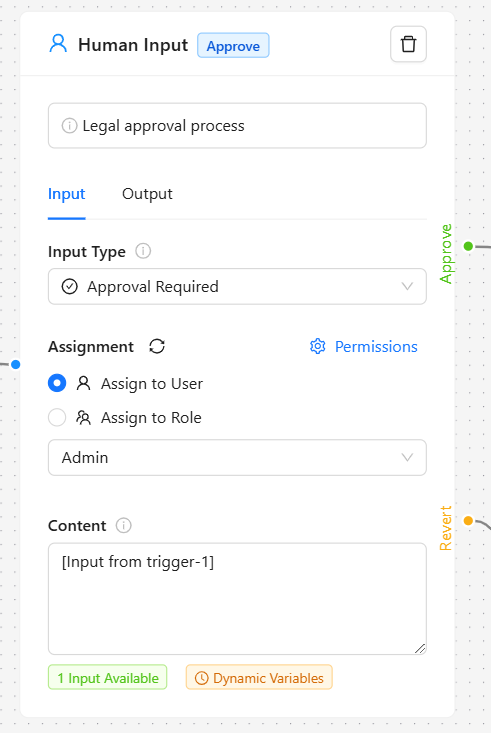
It offers two modes. Approval Required gives a yes-or-no decision with separate Approve and Revert paths, so a rejection can route somewhere useful instead of just stopping. Modification Required lets the reviewer edit the content before the workflow continues, which suits generated copy far better than a blunt yes or no.
Assign each task to specific users or to an entire role. When a run reaches the node it pauses, the task appears under the Tasks menu in wp-admin with a live counter beside it, and the assignee gets an email containing the workflow name, a content preview, and a direct link.
Where to place it, in order of how strongly I would insist:
- Before anything that spends money, issues a refund, or changes an order.
- Before anything that sends a message to a customer under your name.
- Before anything that publishes publicly.
- Before anything that deletes.
You can relax these later once you have run logs showing the agent behaves. Relaxing a gate after evidence is fine. Never having one is not.
How should you test before you scale?
Test an agent the way you would trial a new hire: on real work, supervised, in small volume.
Start with a Manual trigger and run the agent yourself against fifteen or twenty real cases, not invented ones. Real customer questions are messy in ways your test cases never are, and the failures they expose are the failures you will actually get.
Watch the live execution panel rather than only the final output. The interesting information is which tool the agent chose and why, because a right answer reached by the wrong route will break as soon as the inputs change.
Then set the rate limits on the Actions tab deliberately low for the first week. A cap of a few actions per hour turns a runaway loop into a minor annoyance rather than four hundred spreadsheet rows and an apology email.
Finally, keep a list of the cases the agent got wrong and fix them in the instructions, one line at a time. Most agent failures are instruction failures, not model failures.
What agents can you actually build?
Some builds that work well on a WordPress site today:
- Pre-sales agent. Answers plan and feature questions from your documentation, qualifies the visitor, logs the lead to a sheet, and books a call. Approval gate on the booking.
- Support triage agent. Reads an incoming form submission, classifies urgency, drafts a reply, and routes it to the right person in Slack. Approval gate on sending.
- Content research agent. Takes a topic, gathers sources, produces an outline and a draft, and files it as a WordPress draft with a featured image attached.
- Order status agent. Looks up a WooCommerce order for a logged-in customer and explains where it is. Read-only, so no approval gate needed.
- Inbox summariser. Reads the day’s form entries and posts one AI-written digest to Slack instead of thirty raw notifications.
What I would not build yet: anything that autonomously negotiates, anything that touches payments without a human, and anything where a plausible-sounding wrong answer is expensive. Those are not plugin limitations, they are limitations of the current generation of models, and no amount of prompt engineering removes them.
Frequently asked questions
Do I need coding skills to build an AI agent in WordPress?
No. In AI Workflow Automation you drag nodes onto a canvas, connect them by dragging between handles, and fill in tabs for the model, instructions, actions and guardrails. The only writing involved is the system prompt, in plain English. What the no-code builder does not remove is the thinking: deciding what the agent may touch and where a human must approve is still your judgement call.
What is the difference between an AI agent and an AI workflow?
A workflow runs steps you defined, in the order you defined them. An agent decides at run time which actions to take to reach a goal. Anthropic frames it as predefined code paths versus the model directing its own tool usage. Workflows are more predictable and cheaper to run, so use an agent only when the number of possible routes makes a fixed sequence impractical.
Can a WordPress AI agent take actions on my site by itself?
Yes, within the permissions you grant. In AI Workflow Automation the Actions tab lists every capability the agent has, each with an enable toggle, an approval requirement and a rate limit, and anything absent from that table is impossible for the agent. Adding a Human Input node in front of consequential actions pauses the run until someone approves it in the Tasks screen.
How much does running an AI agent cost?
The plugin is free with your own API keys, so you pay your provider’s token charges. Agents cost more per task than simple workflows because each tool call sends another request to the model, so a five-step agent run can cost several times a single prompt. Set spend limits in your provider dashboard and rate limits on the Actions tab before you put an agent in front of the public.
The quickest way to get a feel for this is to build the smallest agent that does something real: one goal, one tool, one approval gate. Install the plugin free from the WordPress plugin directory, and if you want to see what the finished thing looks like in production, the customer service agent demo runs live in the browser. The broader picture of what the plugin automates is on the automation plugin overview.