To write WordPress blog posts with Claude, add an OpenRouter API key in Settings, which is how the plugin reaches Claude models, then build a small workflow: a trigger that supplies the topic, an AI Model node set to a Claude model with your voice built into the prompt, and a Create Post/Product node that maps the result into a draft post. AI Workflow Automation, a free WordPress plugin, does this without any code.
We build this plugin, so this guide describes exactly how the AI Model node, structured output, and the Create Post/Product node behave, not a general description of what Claude can do. AI Workflow Automation is a free WordPress plugin with a visual drag-and-drop builder that runs AI workflows, agents, and chatbots inside your own site, using your own API keys, with no external subscription required.
Most of what currently ranks for this topic walks through Claude Code or an MCP server, useful if you already live in a terminal. This guide covers the other path: a visual, point-and-click workflow inside wp-admin, for anyone who would rather drag nodes than write a script.
How do you connect Claude to WordPress?
Connecting Claude to WordPress means adding an API key the AI Model node can call, not installing a separate Claude plugin. In AI Workflow Automation, Claude models are reached through OpenRouter: create an OpenRouter key, paste it into the plugin’s Settings screen, and every AI Model node on the site can pick a Claude model. If you would rather not manage a key at all, an optional cloud mode runs AI on our keys for credits.
Open AI Workflow Automation from the wp-admin sidebar, then Settings. In the AI provider keys section, enable OpenRouter and paste its key. OpenRouter’s own documentation addresses models as a provider and model pair, for example anthropic/claude-sonnet-4.5, so the same key can later reach Google or Mistral models too. Keys are stored encrypted in your WordPress database and, in local mode, never leave your site. See the full AI provider and API settings reference for every supported provider.
How do you set the AI Model node to a Claude model?
Setting the AI Model node to Claude happens on one tab. Add the node, labeled AI Prompt in the node palette, open the Model tab, and use the search box to filter the live catalog down to Claude. Pick the version you want, write your prompt underneath, and the rest of the node, structured output, vision, knowledge base retrieval, behaves the same whichever provider is behind the model.
The list is loaded from a live catalog, so it stays current, and a reload button refreshes it after you add a new key. Any field that accepts data from earlier steps works the same way: type a slash and a picker of upstream nodes opens, so on a node connected straight to a trigger, you pick the trigger and get [Input from trigger-1] inserted for you. See the AI Model node documentation and data flow and variable handling for the full tag syntax.
How do you turn a Claude draft into a WordPress post automatically?
Turning a Claude draft into a WordPress post takes three connected nodes: a Trigger that supplies the topic, an AI Model node that writes the post with Claude, and a Create Post/Product node that maps the result into WordPress fields. Build it once as a small workflow and rerun it for a new topic in seconds, with the result landing as a draft, not a published page.
Add your API key first if you have not already. Everything below runs in local mode, so it is free once the key is in place.
- Open AI Workflow Automation in wp-admin and create a new workflow. Name it at the top so you can find it later.
- You start on a canvas with a single Trigger node. Click it and set its type to Manual, then type a topic in its content field to test with, for example “5 ways to speed up a WooCommerce store”.
- Drag an AI Prompt node from the AI Actions group onto the canvas and connect the trigger’s output handle to it.
- Open the node, go to the Model tab, and search the catalog for a Claude model.
- In the Prompt box, write your brief and reference the topic with
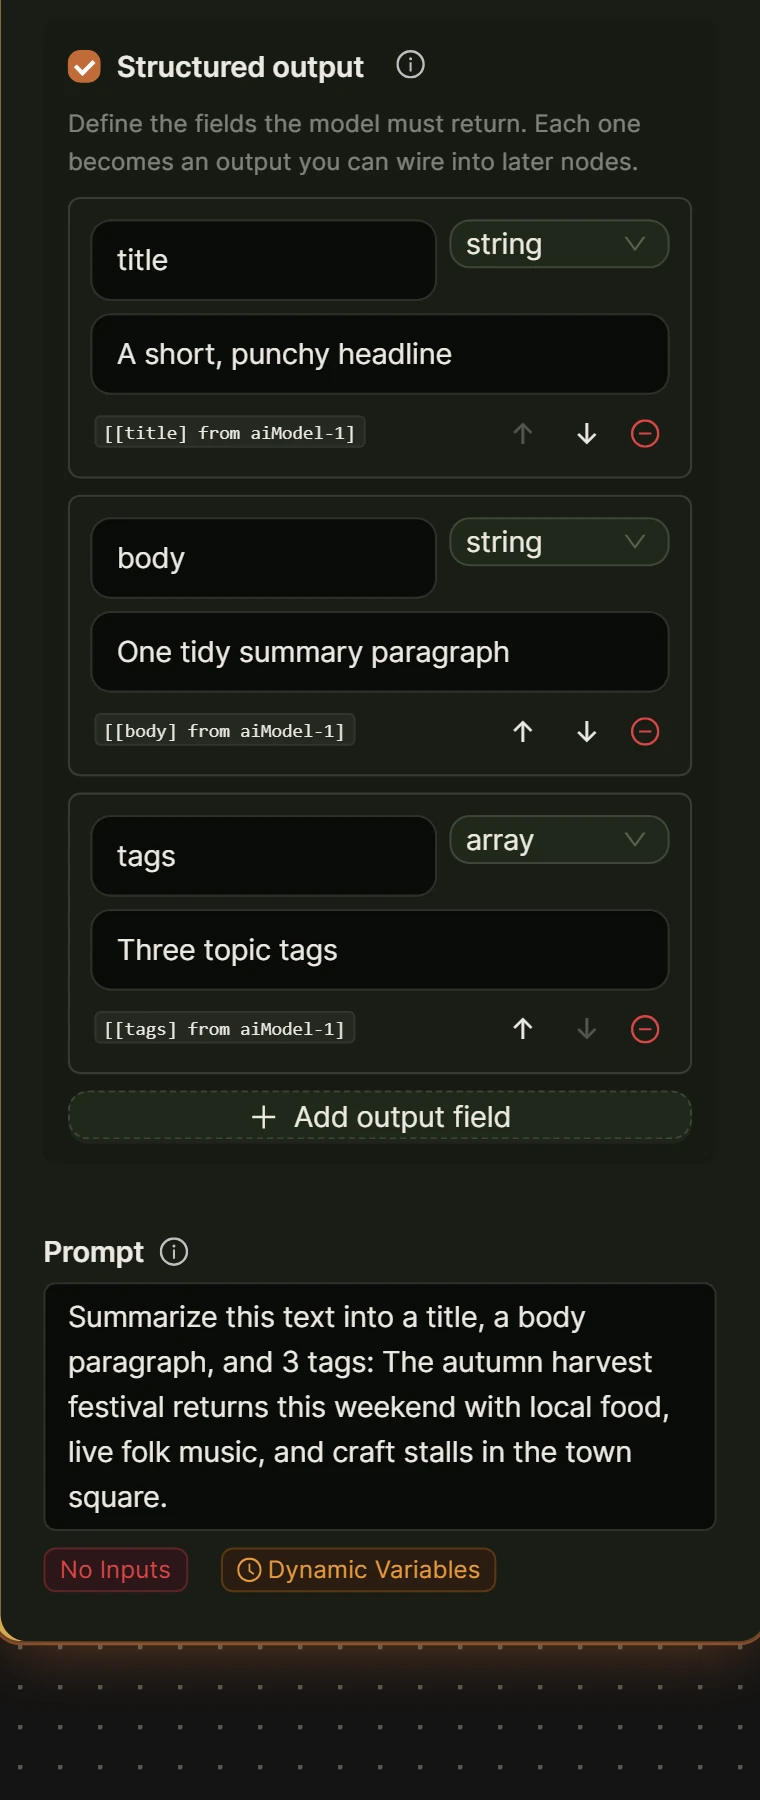
[Input from trigger-1], along with any voice or style instructions you want followed every time. - Still on the Model tab, turn on Structured output and define two fields: title (string) and body (string).
- Drag a Create Post/Product node from the Content & Media group and connect the AI node to it.
- Set Post type to post, and leave Post status on its Draft default.
- In the field mappings, set Post title to
[[title] from ai-1]and Post content to[[body] from ai-1]. - Save the workflow, then click Run. The live execution panel slides in from the right and shows the trigger, the AI node, and the Create Post node firing in turn.
- Open Posts in wp-admin. You will find a new draft with the AI-generated title and body, ready for a read-through before you publish it.
How do you keep Claude’s drafts in your site’s voice?
Keeping Claude’s drafts in your site’s voice comes down to what you put in the Prompt box, since that one field carries both the writing brief and your style rules in the same request. Write a short block covering tone, formatting preferences, point of view, and anything you never want said, then reuse that block at the top of every prompt so each post starts from the same instructions instead of drifting between runs.
Saving that block somewhere you can paste from, rather than retyping it, is worth the five minutes. See building a prompt library in WordPress for one way to keep reusable prompts inside the same site. Structured output helps too: once the schema names title and body separately, Claude has less room to bury the headline inside the article text, because the field the Create Post node reads is scoped to exactly one value.
Is Claude the right model for blog writing, or should you compare it with GPT and others?
Whether Claude is the right model for blog writing depends on the post, not a universal ranking. Claude tends to hold a consistent voice and follow detailed style instructions closely over a long piece; a direct OpenAI model adds web search or file search inside the same node, useful for research-heavy posts; OpenRouter puts dozens of other options one search away if you want to compare outputs first.
| If you want | Choose |
|---|---|
| A steady voice across a long article and close instruction-following | A Claude model, direct or through OpenRouter |
| Web search or file search built into the same node | An OpenAI model added directly; these tools only work on direct OpenAI models |
| To compare Claude against Gemini, Llama, Mistral, and others without new keys | A model routed through OpenRouter |
| Your site’s own already-configured provider, on WordPress 7.0 or later | WordPress AI (site default) |
None of this is a benchmark claim. Model quality shifts with every release, and the version in the catalog today may not be the one there in six months. Test your own prompt on your own topic before committing, since a general reputation for good writing does not guarantee it fits your house style.
Should Claude publish directly, or should a person review the draft first?
A person should read a Claude draft before it goes live, even though the workflow can technically publish it straight away. The Create Post/Product node defaults its Post status to draft for exactly this reason, and that default is worth keeping: an AI draft can state something confidently and incorrectly, miss a recent change to a product or price, or simply not sound like your site yet.
If more than one person publishes to the site, add a Human Input node between the AI Model node and the Create Post/Product node, set to Modification Required, so a reviewer edits the draft before it reaches WordPress at all. On a solo site, opening the new draft in the post editor before you hit Publish covers the same ground.
Frequently asked questions
Do I need to know how to code to use Claude for WordPress blog posts?
No. AI Workflow Automation is a free WordPress plugin with a visual drag-and-drop builder, so you add a Trigger node, an AI Model node set to Claude, and a Create Post/Product node, then connect them with your mouse. The only writing involved is the prompt in the AI node’s Prompt box, in plain English, plus the field mappings that tell WordPress which output goes where.
Is blog content written with Claude bad for SEO?
Not on its own. In its guidance on creating helpful content, Google says “If you use automation, including AI-generation, to produce content for the primary purpose of manipulating search rankings, that’s a violation of our spam policies.” What its systems reward is people-first, helpful, reliable content, regardless of which tool wrote the first draft, so treat a Claude draft as a starting point to edit and fact-check rather than a finished post to publish untouched.
How much does it cost to use Claude in AI Workflow Automation?
Nothing on our side. In local mode you add your OpenRouter key in Settings and pay OpenRouter per token at the underlying provider’s price, the same as calling the API yourself; see BYOK keys vs keyless credits for the alternative. An optional cloud mode runs workflows on our hosted engine for credits if you would rather not manage a key, and on that path the AI Model node costs 2 credits per run.
Can I use Claude and OpenAI models in the same workflow?
Yes. The AI source and the model are chosen per node, not once for the whole workflow, so one AI Model node can run on a Claude model while another node in the same workflow runs on GPT. This makes it straightforward to route each step to whichever model suits that particular job, without maintaining two versions of the same workflow.
Which API key do you need to use Claude in WordPress?
An OpenRouter key. AI Workflow Automation reaches Claude models through OpenRouter, so you create a key on openrouter.ai, add credit to that account, and paste the key into the AI provider keys section of the plugin’s Settings screen, where it is encrypted in your WordPress database. The same key then reaches Claude and many other models from one account.
The fastest way to see this working is to build the small workflow above once: one topic in, one draft post out. Install the plugin free from the WordPress plugin directory, and for the wider picture of AI-generated content in WordPress, read automating blog posts with AI in WordPress next.