Google Sheets as your WordPress Database
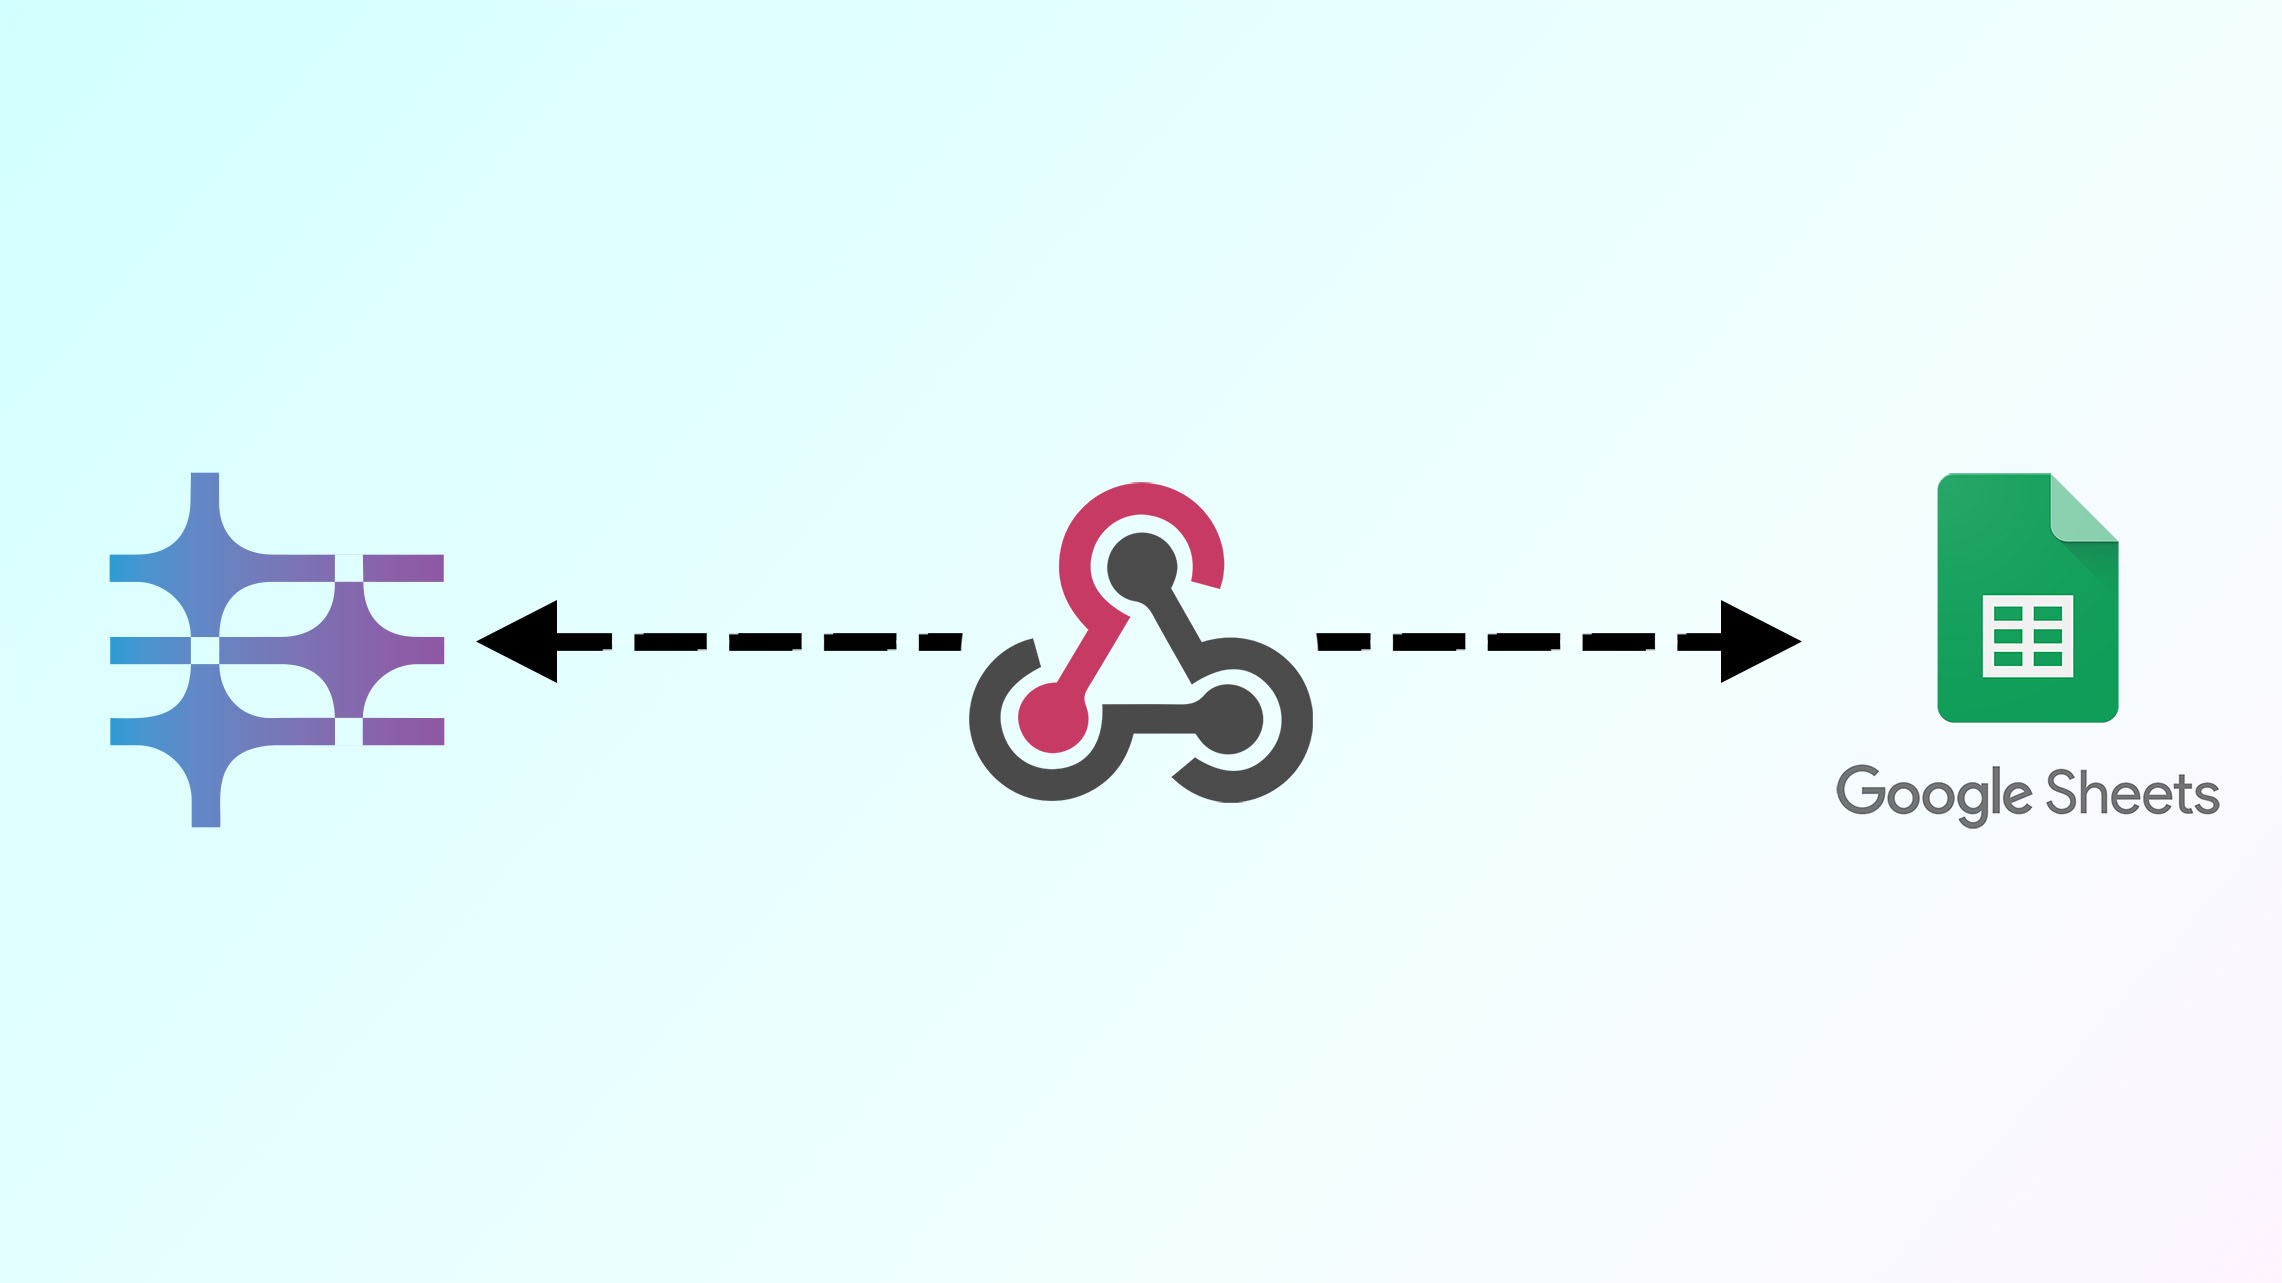
Google Sheets integration is a highly sought-after feature in workflow automation. While we’re working on developing a robust, native integration for our AI Workflow Automation plugin, we want to provide you with effective methods to connect your workflow triggers and outputs to Google Sheets. This guide will walk you through two key processes: setting up Google Sheets as a trigger for your workflows and using webhooks to save workflow outputs to your sheets.
Part 1: Setting Up Google Sheets as a Workflow Trigger
Follow these steps to configure Google Sheets to trigger your AI Workflow Automation:
Let’s assume that you have already designed your workflow in AI Workflow Automation plugin. You need to set your Trigger node type to Webhook. When you do this, the node will automatically generate a webhook link for you. Copy this link as we would use it later.

1- Prepare Your Google Sheet
Open an existing Google Sheet or create a new one.
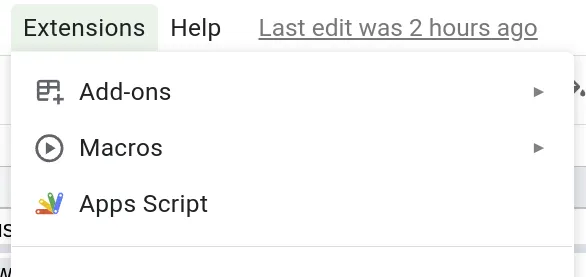
Navigate to the “Extensions” menu and select “Apps Script”.
2- Configure the Apps Script
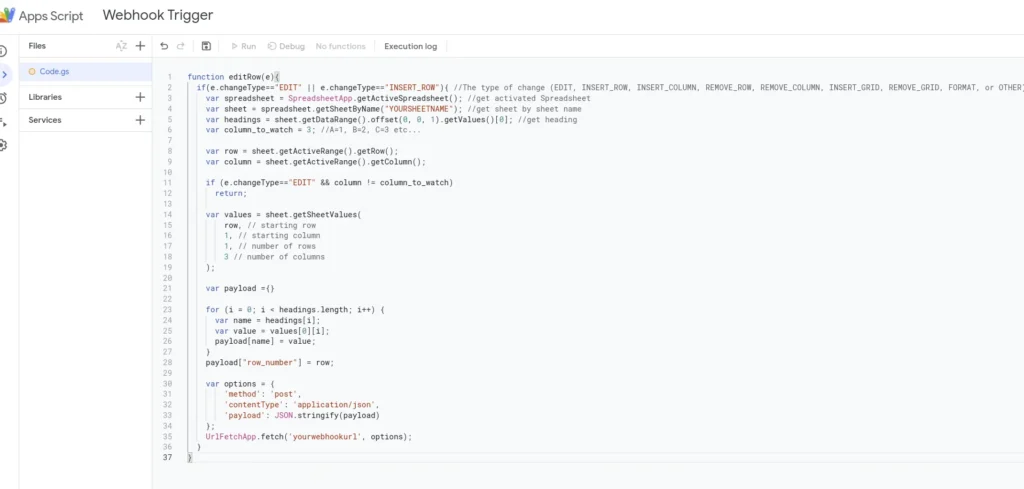
In the Apps Script editor (a file called Code.gs), replace the existing function with the following code (just copy it):
function editRow(e){
  if(e.changeType=="EDIT" || e.changeType=="INSERT_ROW"){ //The type of change (EDIT, INSERT_ROW, INSERT_COLUMN, REMOVE_ROW, REMOVE_COLUMN, INSERT_GRID, REMOVE_GRID, FORMAT, or OTHER)
    var spreadsheet = SpreadsheetApp.getActiveSpreadsheet(); //get activated Spreadsheet
    var sheet = spreadsheet.getSheetByName("YOURSHEETNAME"); //get sheet by sheet name
    var headings = sheet.getDataRange().offset(0, 0, 1).getValues()[0]; //get heading
    var column_to_watch = 3; //A=1, B=2, C=3 etc...

    var row = sheet.getActiveRange().getRow();
    var column = sheet.getActiveRange().getColumn();

    if (e.changeType=="EDIT" && column != column_to_watch)
      return;

    var values = sheet.getSheetValues(
        row, // starting row
        1, // starting column
        1, // number of rows
        4 // number of columns
    );

    var payload ={}

    for (i = 0; i < headings.length; i++) {
      var name = headings[i];
      var value = values[0][i];
      payload[name] = value;
    }
    payload["row_number"] = row;

    var options = {
        'method': 'post',
        'contentType': 'application/json',
        'payload': JSON.stringify(payload)
    };
    UrlFetchApp.fetch('yourwebhookurl', options);
  }
}
It should look like this:
3- Configure the Script
- Change or edit the e.changeType==”INSERT_ROW” with other options that you can see in front of it in the text. In this case the Workflow will be triggered when a new row is inserted. You can also choose to trigger the workflow when a column value changes for example.
- Replace “YOURSHEETNAME” with your actual sheet name (default is “Sheet1”).
- Adjust the
column_to_watchvalue (Line 6) to correspond with your target column (A=1, B=2, C=3, etc.). If you are setting your to Changetype to Edit, then if the value in the selected column changes the trigger will happen.
- Modify the number of columns to pull data from (Line 18).
- Replace “yourwebhookurl” (Line 35) with the Webhook URL from your AI Workflow Automation Trigger node.
- Save your function.
4- Setup the Trigger
- Click on the clock icon called Triggers in the left sidebar of the script editor.
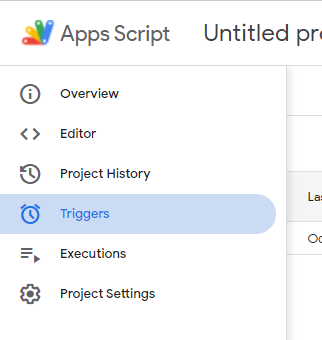
- Click “Add Trigger” in the bottom right corner.
- In the popup window, set “Select Event Type” to “On change”.
- Save and authorize the trigger when prompted.
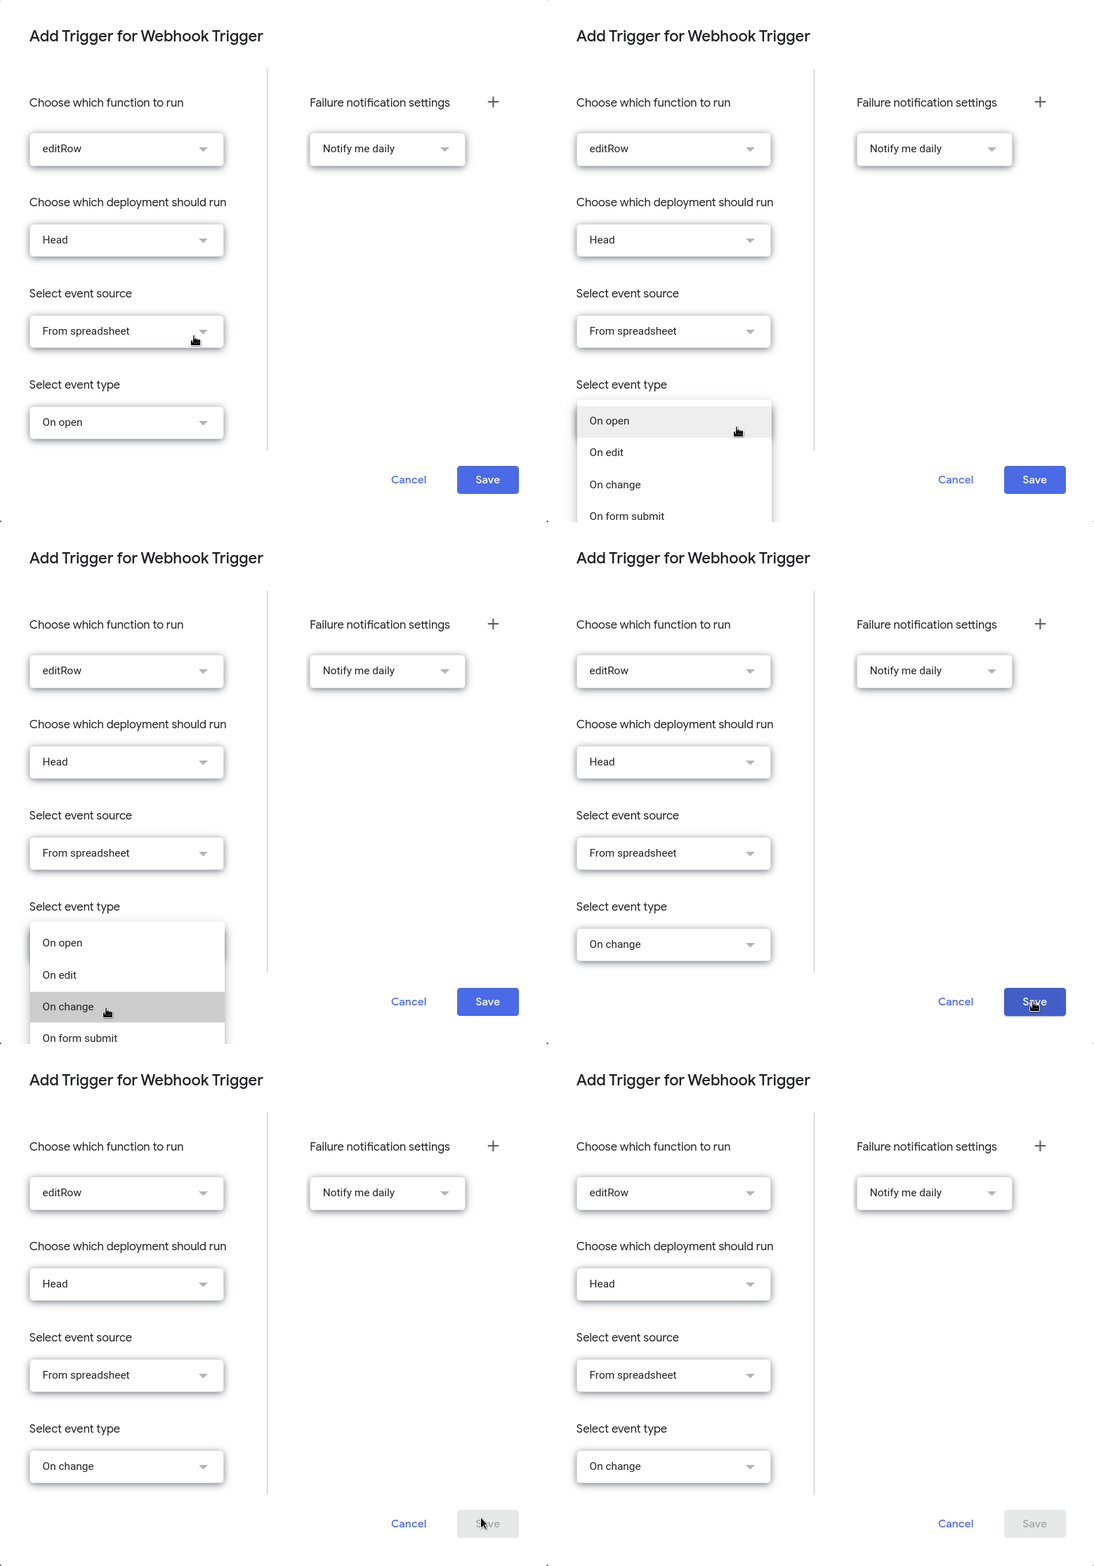
You will now be asked to approve this trigger using normal Oauth, choose the correct Google account and approve.
And that’s it!
Now when your selected action happens you can get your data in your AI Workflow Automation plugin.
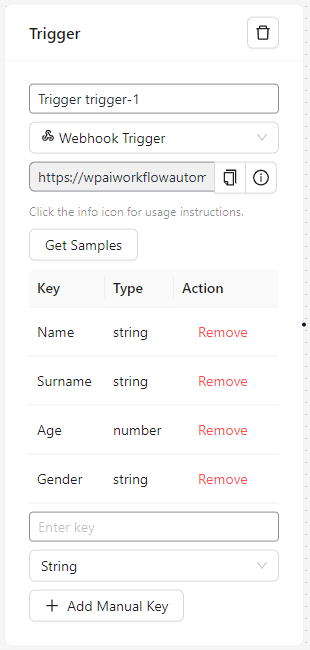
The Webhook Trigger in your workflow has a function with a button called get samples. This function will automatically identify the structure of the data being received from the webhook. In the case of Google Sheets, your first row represents your data headers.
If you click on get samples, and go back to your sheets and add a new row (or whatever action that you chose) then you should receive your data structure in your trigger node immediately. You can then use each of these data sources separately in the subsequent nodes. It would look like this:
Part 2: Saving Workflow Outputs to Google Sheets
For this process, we’ll utilize a pre-existing add-on from the Google Workspace Marketplace:
1- Install the Add-on
- Open your target Google Sheet.
- Go to Extensions > Add-ons > Get Add-ons.
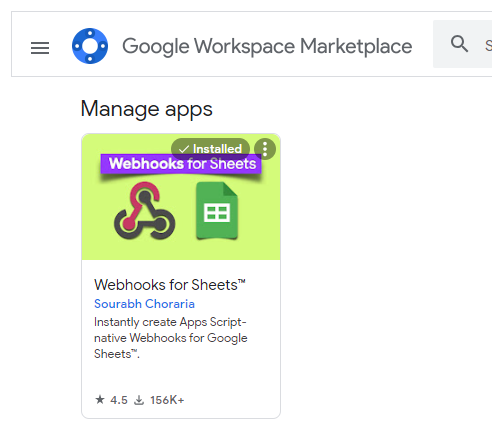
- Search for “Webhooks for Sheets” by Sourabh Choraria.
- Install the add-on and follow the installation instructions.
2- Configure Your Workflow
- Copy the Webhook URL provided by the add-on.
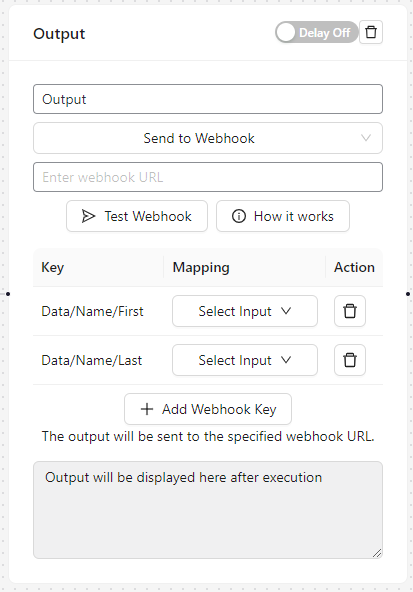
- In your AI Workflow Automation plugin, add an Output Node to your workflow. Set the output type to Webhook.
- Paste the copied URL into the URL section.
- Map your data keys as needed. (Refer to the “How it works” button on the node for detailed instructions on creating nested and complex data structures.)
And that’s it!
Conclusion
By following this guide, you’ve successfully integrated Google Sheets with your AI Workflow Automation processes. This setup allows you to trigger workflows based on sheet changes and save workflow outputs directly to your Google Sheets, enhancing your automation capabilities.
While we continue to develop a more streamlined, native integration, these methods provide a robust solution for leveraging the power of Google Sheets in your workflows. As always, we’re committed to improving our plugin and welcome your feedback on this integration process.
Remember, the flexibility of AI Workflow Automation combined with the ubiquity of Google Sheets opens up a world of possibilities for your data management and automation needs. We encourage you to explore these capabilities and discover how they can optimize your workflows.
