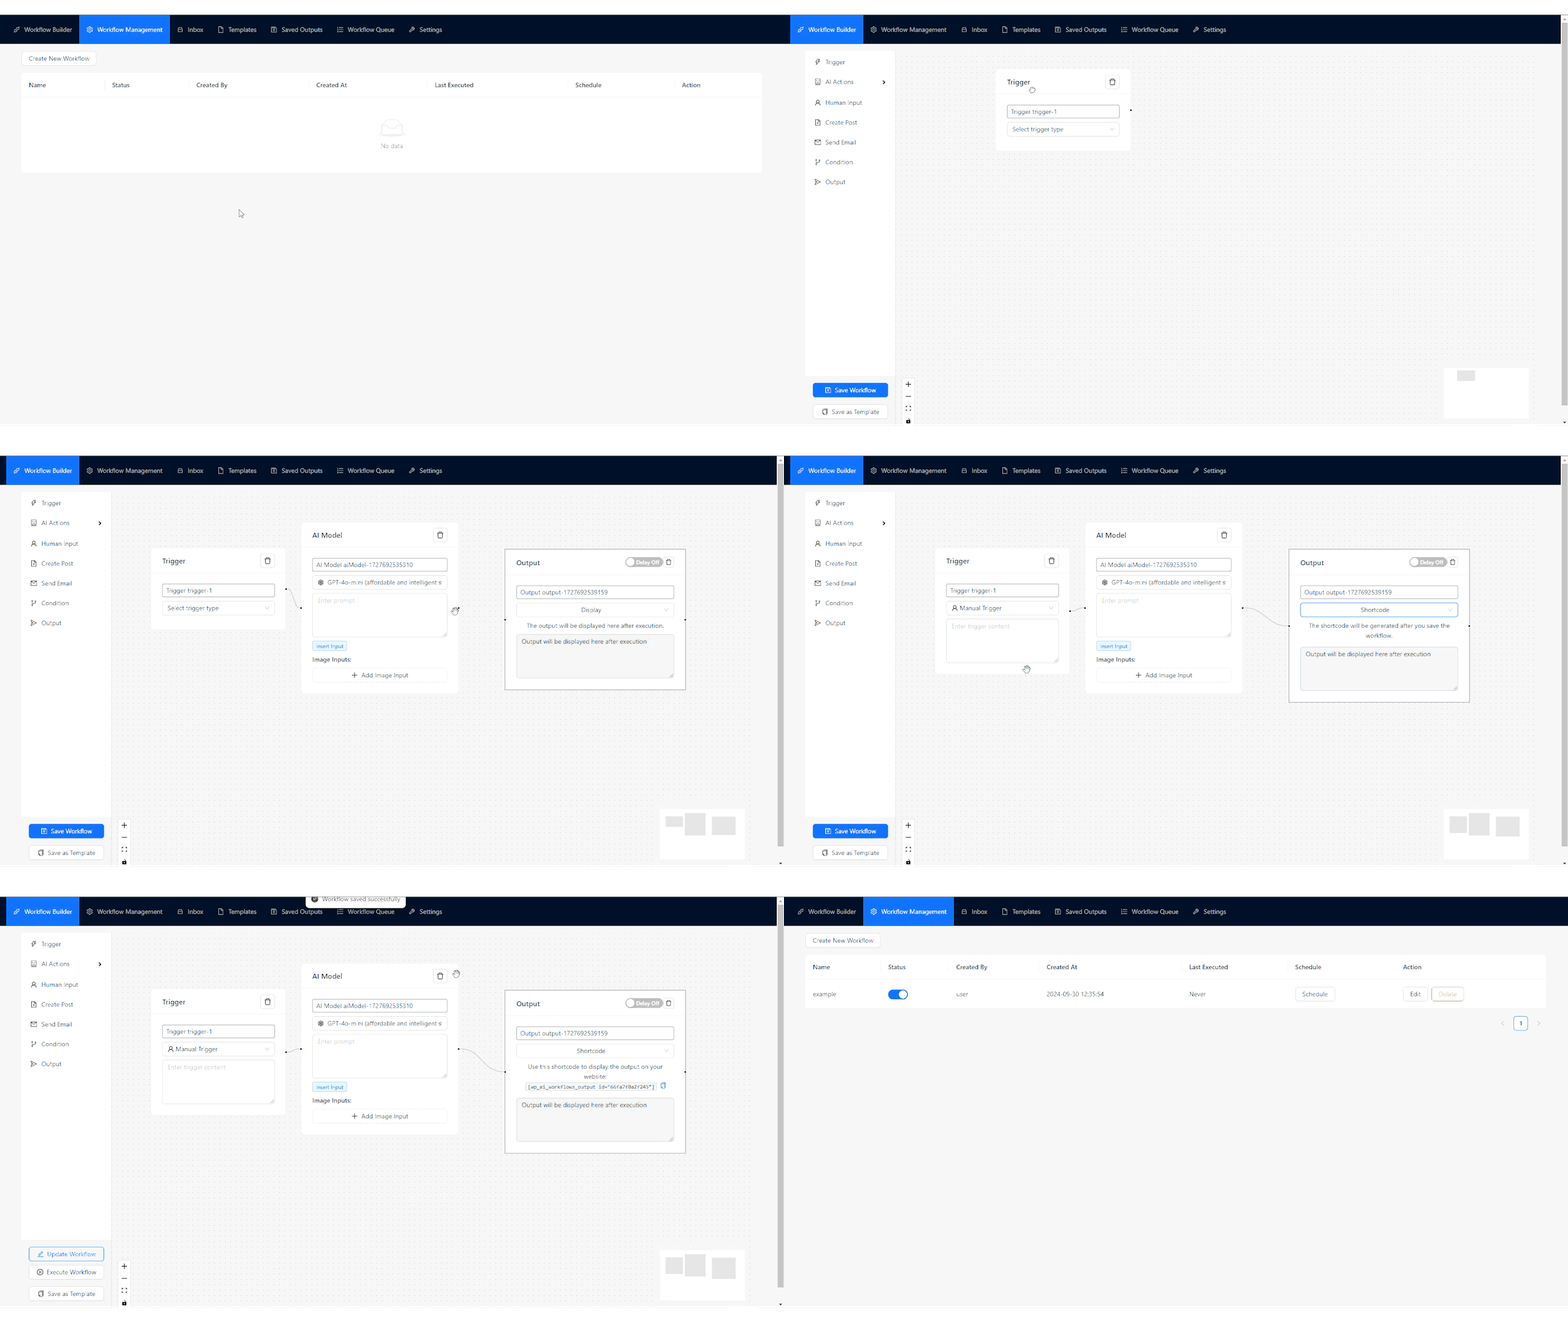
AI Workflow Automation allows you to create powerful, generative AI-driven workflows in WordPress. Here’s how to get started quickly:
- Access the Workflow Builder:
- In your WordPress admin panel, go to AI Workflows > New Workflow.
- You’ll be presented with the visual workflow builder interface.
- Choose a Trigger:
- Either select a pre-configured template or click on “Start from Scratch”.
- (If a Trigger node is not already on the canvas) Drag a Trigger node from the sidebar onto the canvas.
- Configure the trigger (e.g., manual, form submission, webhook).
- Add AI Processing:
- Drag an AI Model node onto the canvas.
- Connect it to your trigger node.
- Choose an AI model and enter your prompt or instructions.
- Set Up Output:
- Add an Output node and connect it to your AI Model node.
- Configure how you want to use the AI-generated content.
- Save and Activate:
- Name your workflow and click “Save Workflow”.
- Activate the workflow to make it live.


